Balance Trainer Inflation and Floor Grip: Home Setup Checks
A balance dome needs a stable, uncluttered practice space. Learn basic inflation, surface-grip and storage checks before a beginner session.
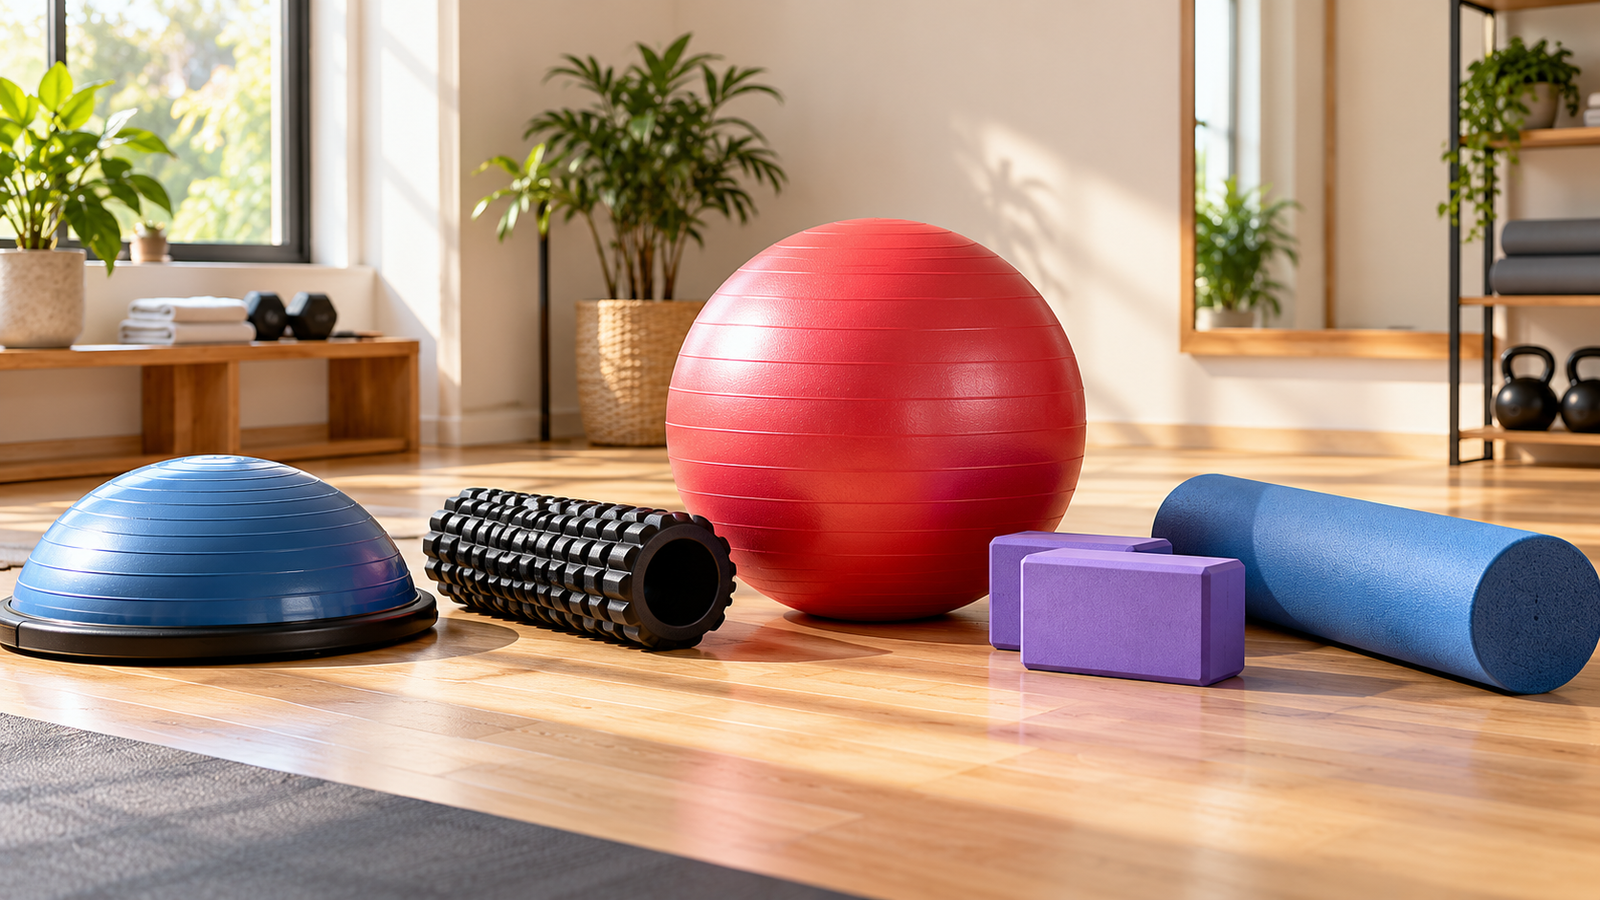
Balance trainers are popular additions to home workout spaces because they can introduce an element of instability into selected exercises. From standing balance drills and controlled weight shifts to certain core-training movements, these tools offer different ways to challenge coordination and body control.
However, an inflatable balance trainer is only as dependable as its setup.
A dome that is incorrectly inflated, a base resting on a slippery floor, or a damaged surface can make an exercise unnecessarily difficult and potentially unsafe.
These problems are particularly relevant when setting up equipment at home, where flooring materials, available space, and nearby furniture can differ considerably from a professional training environment.
Many users focus on the exercises they plan to perform but spend very little time checking the condition of the trainer itself.
Inflation, floor contact, equipment orientation, and surrounding space should all be checked before stepping onto an inflatable balance trainer.
It is also important to understand that not every balance trainer has the same design. An inflatable half-dome trainer, a balance cushion, and a rigid wobble board may all challenge stability, but they have different construction and setup requirements.
This guide focuses primarily on inflatable dome-style balance trainers used for home exercise. It explains how inflation affects the equipment, why floor grip matters, how to inspect the base, and how to build a safer setup for beginner and intermediate balance activities.
1. What Is a Balance Trainer?
A balance trainer is a piece of exercise equipment intended to introduce an unstable or responsive surface into certain movements.
Unlike standing directly on a firm floor, using a balance trainer requires the body to make continuous adjustments as the equipment or contact surface responds to movement.
Different balance trainers achieve this in different ways.
Inflatable dome balance trainers
A common design consists of an inflatable rubber or polymer dome attached to a rigid or semi-rigid circular platform.
The curved surface changes shape slightly under pressure, creating a responsive standing or support surface.
This design is often called a half-ball or dome balance trainer.
Some models are intended for exercises using the dome facing upward. Certain models also permit selected exercises with the platform facing upward, but this should never be assumed for every product.
Inflatable balance cushions
Balance cushions are smaller, air-filled discs generally used for selected seated, standing, or other balance activities.
They have different dimensions and loading characteristics from larger dome trainers.
Their inflation instructions should not be borrowed from a half-dome trainer.
Wobble boards
A wobble board usually features a rigid platform with a rounded or otherwise unstable underside.
Many wobble boards do not contain air and therefore do not require inflation.
Rocker boards
Rocker boards generally tilt along a particular axis rather than moving freely in every direction.
They also have different setup and stability characteristics.
Why the distinction matters
An exercise that appears suitable for one balance trainer may be inappropriate for another.
Inflation requirements, permitted orientation, maximum user load, footwear recommendations, and surface restrictions can differ.
Always identify the exact equipment type before following an exercise or setup tutorial.
2. Why Proper Inflation Matters
For an inflatable dome trainer, air pressure influences how the curved surface responds when force is applied.
A properly inflated dome should behave within the limits established by its manufacturer.
The purpose is not simply to make the surface as firm or as soft as possible.
Inflation affects surface response
An inflatable surface changes shape when weight is applied.
The amount and pattern of movement depend on several factors, including:
- Internal air pressure
- Dome material
- Equipment dimensions
- Load applied
- Temperature
- Design of the supporting platform
- Manufacturing specifications
Changing the inflation level can alter how the equipment responds.
However, that does not mean users should deliberately experiment with extreme inflation levels to increase exercise difficulty.
Underinflation can affect support
A dome containing insufficient air may compress more than intended.
Depending on the design, it may feel excessively soft, deform unevenly, or fail to provide the expected exercise surface.
This could make certain movements harder to control.
Overinflation can create problems
Adding more air than recommended may place unnecessary stress on the dome, seams, valve, or connection to the platform.
It may also change the shape and response of the equipment.
Overinflating a balance trainer is not a reliable or recommended way to make exercises more challenging.
There is no universal inflation pressure
Different products may specify different inflation procedures.
One trainer may include a pump and an inflation-height reference.
Another may specify a pressure range or a different visual check.
Do not assume that the inflation instructions for one brand or model apply to another.
The correct inflation level is the one specified for your particular trainer, not the level that happens to feel most challenging.
3. How to Inflate a Dome Balance Trainer Correctly
Before adding air, locate the manufacturer’s instructions.
If you have lost the printed manual, check the official documentation for the exact model.
Avoid relying on a generic pressure recommendation from an unrelated product.
Step 1: Inspect the equipment before inflation
Place the trainer on a clean, level surface.
Check the dome for:
- Cuts or punctures
- Cracks
- Unusual bulges
- Visible material deterioration
- Separation near the base
- Damage around the inflation valve
Do not inflate a trainer showing signs of significant structural damage.
Step 2: Identify the inflation valve
Find the valve specified by the manufacturer.
Check whether it has a removable plug or requires a particular adapter.
Avoid forcing an unfamiliar pump attachment into the opening.
Damaging the valve can cause persistent air leakage.
Step 3: Use an appropriate pump
Use the pump supplied with the trainer or another pump explicitly approved for that model.
Do not assume that a high-pressure tyre pump or compressor is suitable.
Equipment designed for vehicle tyres may deliver air at pressures inappropriate for exercise products.
Step 4: Inflate gradually
Add air in a controlled manner.
Pause periodically to check the shape and inflation reference described in the manual.
Avoid attempting to reach the final inflation level in one uncontrolled burst.
Step 5: Check the manufacturer’s measurement
Some trainers use a specific dome-height measurement or other reference rather than a pressure reading.
Follow the applicable instruction.
A visual judgment that the dome looks firm is not an adequate substitute when the manufacturer provides a defined measurement.
Step 6: Secure the valve
After reaching the specified inflation level, close the valve according to its instructions.
Confirm that the plug or closure is seated properly.
Do not use adhesives or improvised materials to seal a damaged valve.
Step 7: Inspect the trainer again
Check whether the dome maintains the intended shape.
Look for unexpected deformation, leaking air, or movement around the base connection.
Do not stand on the trainer until the inflation procedure and safety checks are complete.
4. How to Recognize Incorrect Inflation
Not every inflation problem is immediately obvious.
A trainer may look relatively normal while behaving differently from its intended condition.
Signs of possible underinflation
Depending on the model, these may include:
- Excessive sagging of the dome
- Noticeably uneven compression
- Failure to maintain the specified dome height
- Unusual wrinkling during loading
- Loss of air between sessions
- Contact between surfaces that should remain separated
Some flexible deformation is normal for inflatable equipment.
The relevant question is whether the trainer remains within the manufacturer’s specifications.
Signs of possible overinflation
Possible warning signs include:
- Dome dimensions beyond the specified limits
- Unusual stretching near seams or attachment points
- Unexpected distortion
- Valve movement or leakage
- Surface tension inconsistent with the manufacturer’s instructions
Do not continue inflating a trainer simply because its surface still yields slightly under hand pressure.
What if the inflation level feels wrong?
Stop using the equipment until you can verify the specified setup.
If the dome repeatedly loses air or changes shape, inspect the valve and contact the manufacturer.
Do not attempt to repair structural damage using ordinary household adhesives or puncture-repair products unless an appropriate manufacturer-approved repair procedure exists.
5. Why Floor Grip Is Important
Correct inflation is only one part of a reliable balance trainer setup.
The relationship between the trainer’s base and the floor is equally important.
A balance trainer may be designed to create instability at the exercise surface, but that does not mean its supporting base should slide unexpectedly across the floor.
Controlled instability versus unintended slipping
During a balance exercise, the user responds to movement in the intended training surface.
That is different from the entire trainer unexpectedly moving away from its original position.
If the base slides, the user’s weight may shift in a direction they did not anticipate.
This can make a movement difficult to control.
Friction between surfaces
Floor grip depends on the interaction between the trainer’s base and the material beneath it.
Relevant factors can include:
- Base material and condition
- Floor material
- Surface texture
- Dust
- Water
- Cleaning-product residue
- Equipment orientation
- Loading direction
A trainer that remains stable on one type of floor may behave differently on another.
Why a clean floor matters
Dust and loose particles can reduce reliable contact between surfaces.
Water or certain cleaning residues can also make a floor more slippery.
Before exercising, inspect and clean the intended workout area using methods appropriate for the flooring.
Allow the floor to dry completely.
The base should maintain the contact intended by the manufacturer rather than slipping unpredictably during ordinary permitted use.
6. Setting Up a Balance Trainer on Tile Flooring
Tiles are common in many Indian homes.
They are convenient to clean, but their grip characteristics vary widely.
Some tiles have a textured surface.
Others have a polished or glossy finish.
Check whether the floor is slippery
Examine the area for moisture, dust, soap residue, or cleaning-product film.
A tiled bathroom or freshly mopped floor is not an appropriate place to begin balance training.
Inspect the grout and tile edges
Uneven tiles or raised edges may interfere with stable equipment placement.
Choose a level area without damaged or loose tiles.
Check the trainer’s base
Inspect the underside for dust, damage, or worn contact surfaces.
Follow the manufacturer’s cleaning instructions.
Avoid assuming all tiles provide the same grip
A textured tile and a highly polished tile may behave differently.
Even within the same home, flooring conditions can change.
Should you place a yoga mat underneath?
Not automatically.
A soft yoga mat can deform, fold, or move under certain loads.
Some balance trainer manufacturers may recommend specific floor surfaces or compatible protective mats.
Follow those recommendations rather than assuming any exercise mat improves safety.
If the manufacturer’s instructions do not permit the proposed setup, choose another appropriate surface.
7. Using a Balance Trainer on Wooden or Laminate Floors
Wooden and laminate flooring may provide a comfortable-looking workout environment, but surface protection and grip still need attention.
Inspect the surface
Look for:
- Loose flooring sections
- Uneven joints
- Moisture
- Dust
- Slippery cleaning residue
- Damaged planks
Choose a level, dry location.
Protect the flooring appropriately
Some equipment may leave marks or create concentrated pressure on the floor.
If floor protection is needed, use only a compatible surface or protective layer recommended for the trainer.
A soft mat that moves beneath the equipment can introduce a new slipping hazard.
Watch for movement
Before beginning a workout, check whether the equipment maintains its intended floor contact.
If the base shifts or slides during a gentle permitted setup check, do not proceed.
Avoid using furniture polish near the workout area
Certain floor-cleaning or polishing products can leave surfaces slippery.
Make sure the floor is suitable for exercise after cleaning.
Do not assume that a dry-looking floor is necessarily free of slippery residue.
8. Can You Use a Balance Trainer on Carpet?
Carpet introduces a different set of considerations.
The main issue is that carpet and its underlay can compress or move under load.
Thin, firmly secured carpet
A low-pile carpet may behave differently from a thick, soft carpet.
However, suitability depends on the specific trainer’s instructions.
Thick carpet
Thick or heavily cushioned carpet may interfere with predictable support.
The underlying material may compress unevenly.
Loose rugs
A loose rug can shift, bunch, or fold.
This creates an additional moving surface beneath the trainer.
Avoid using a loose rug as a substitute for a suitable workout floor.
What is the safest approach?
Check the manufacturer’s approved floor surfaces.
If carpeting is not recommended, do not use it merely because it feels softer.
Move the trainer to an appropriate, level surface.
9. Choosing the Right Space for Home Balance Training
A balance trainer needs more than enough floor space for the equipment itself.
The surrounding area must also accommodate the user’s movements.
Keep furniture away
Avoid setting up immediately beside sharp furniture corners, glass tables, or other hard obstacles.
A loss of balance can produce unexpected movement beyond the equipment.
Maintain adequate clearance
Consider the space needed for:
- Stepping onto the trainer
- Stepping off safely
- Moving the arms
- Performing the intended exercise
- Recovering from minor instability
Different activities require different amounts of clearance.
Remove loose objects
Shoes, dumbbells, resistance bands, water bottles, and other items should not remain in the immediate stepping area.
An object that seems harmless during setup may become an obstacle during an unexpected dismount.
Check lighting
Choose an area with sufficient light to see the equipment surface and nearby floor.
Avoid exercising in a poorly lit room.
Consider ceiling clearance
Movements involving raised arms or overhead equipment require adequate vertical space.
Never assume that a room suitable for basic standing balance drills is suitable for every exercise.
Keep children and pets away from the workout area
Unexpected movement from another person or an animal can create additional hazards while balancing.
Set clear boundaries during exercise.
10. Dome Up or Platform Up: Does Orientation Matter?
Some dome balance trainers are designed to support exercises in more than one orientation.
Others have restrictions.
Dome-facing-up use
In this configuration, the rigid platform rests on the floor and the inflatable surface faces upward.
Users may perform approved standing, stepping, or floor-based exercises on the dome.
Even in this orientation, exercise selection should match the user’s ability and the manufacturer’s instructions.
Platform-facing-up use
With certain trainers, the platform can face upward while the dome contacts the floor.
This changes the way the equipment moves.
The exercise surface may become substantially less predictable for an inexperienced user.
Not every trainer permits inverted use
Some manufacturers restrict the exercises or orientations allowed for their products.
Do not invert a trainer merely because you have seen someone else do it in a video.
Avoid experimenting with unstable configurations
A particular orientation may place different forces on the equipment’s connection points or surfaces.
Follow the model’s intended usage.
Equipment orientation is a manufacturer-specific safety requirement, not simply a personal preference.
11. How to Perform a Pre-Workout Stability Check
Before beginning your routine, inspect the equipment in a consistent sequence.
This helps identify obvious problems before you place your full body weight on the trainer.
Step 1: Check the floor
Confirm that the surface is level, clean, dry, and suitable for the model.
Step 2: Inspect the dome
Look for cuts, unusual bulges, deformation, and other signs of damage.
Step 3: Confirm inflation
Compare the dome’s condition with the manufacturer’s inflation specifications.
Step 4: Examine the base
Check for cracks, worn contact areas, loose components, or dirt.
Step 5: Inspect the valve
Make sure the inflation closure is secure and not visibly leaking.
Step 6: Confirm orientation
Use the equipment only in an orientation permitted for the intended exercise.
Step 7: Check surrounding clearance
Remove obstacles and ensure sufficient room to step off.
Step 8: Confirm an appropriate support option
Beginners may benefit from a stable handhold or assistance where suitable.
Any support used should be secure and appropriate for the activity.
Do not rely on lightweight furniture that could move or tip.
Step 9: Begin only with a permitted movement
Start with a controlled exercise appropriate for your experience.
If the trainer shifts unexpectedly, makes unusual sounds, or appears damaged, stop and reassess.
12. How Beginners Should Approach Balance Trainer Exercises
Inflatable balance equipment can challenge stability even during relatively simple movements.
Beginners should prioritize controlled movement rather than difficulty.
Start with basic control
Before attempting complex exercises, become familiar with the equipment’s movement under safe, supervised or appropriately supported conditions.
Use only exercises recommended for your model and ability level.
Keep movements slow
Sudden shifts can make it harder to respond to the moving surface.
Controlled movements are generally easier to monitor.
Avoid rushing onto the dome
Mounting and dismounting require attention.
Follow the manufacturer’s recommended entry and exit techniques.
Use a stable support when appropriate
A suitable support can help some beginners learn controlled movements.
However, the support itself must be secure.
An unstable chair or movable table can create an additional hazard.
Do not begin with jumping exercises
Jumping or dynamic plyometric movements place greater demands on balance and equipment.
They should not be used as beginner exercises simply because they appear in online demonstrations.
Some trainers may prohibit certain jumping activities entirely.
Progress gradually
Increase difficulty only after you can perform the current activity with appropriate control.
Do not use intentional overinflation, unsafe surfaces, or prohibited orientations as progression methods.
13. Safe Foot Placement and Body Position
Foot placement can affect how the trainer responds.
The exact position depends on the exercise and the equipment’s dimensions.
Follow model-specific instructions
Some manufacturers provide diagrams showing recommended standing positions.
Use those instructions rather than copying foot placement from an unrelated trainer.
Avoid standing near unsuitable edges
Standing on areas not intended to bear load can create additional risk.
For example, placing a foot partly on a rigid rim may produce a different response from standing on the designated exercise surface.
Maintain controlled movements
Avoid exaggerated leaning or twisting beyond your ability.
When balance becomes difficult to control, stop and return to an appropriate starting position.
Be aware of fatigue
Fatigue can affect coordination and movement control.
If you begin losing control, end the activity rather than continuing to complete a predetermined number of repetitions.
Do not treat unstable movement as proof of effectiveness
More wobbling does not automatically mean a better workout.
The aim is controlled exercise using an appropriate level of challenge.
Poor control may simply indicate that an exercise is too difficult for the current setup.
14. Should You Exercise Barefoot or Wear Shoes?
Footwear recommendations depend on the balance trainer’s design and the intended activity.
Some exercises may be performed barefoot when the manufacturer permits it.
Others may require suitable athletic footwear.
Barefoot use
Barefoot exercise changes how the foot contacts the training surface.
However, bare feet may be more vulnerable to slipping under certain conditions, particularly when moisture is present.
Barefoot use should not be assumed suitable for every model.
Athletic shoes
Appropriate footwear may provide a different contact surface and additional foot protection.
However, shoes with unsuitable soles or worn tread can also affect grip.
Socks
Ordinary socks may slide on certain training surfaces.
Do not assume that socks provide reliable traction.
Follow the equipment directions
Use the footwear recommended for the trainer and activity.
Avoid switching between barefoot, socks, and shoes without considering how each changes surface contact.
15. Why Balance Trainers Sometimes Slide Across the Floor
A trainer moving unexpectedly is a warning that requires investigation.
Possible explanations include several factors.
Dust beneath the base
Loose material can interfere with reliable contact.
Clean the floor and base exterior according to appropriate instructions.
A wet surface
Water can change friction between the trainer and floor.
Do not exercise until the area is dry.
Slippery floor finish
Some polished surfaces provide insufficient grip for particular equipment.
Choose a suitable alternative rather than continuing to test increasingly difficult movements.
Worn base material
Over time, contact surfaces can deteriorate.
A damaged or worn base may no longer behave as intended.
An unsuitable exercise mat
A loose or compressible mat can move beneath the trainer.
Avoid using unapproved layers to solve a grip problem.
Incorrect equipment orientation
An orientation not intended for a particular exercise can change floor contact.
Check the manufacturer’s directions.
Dynamic exercise forces
Some movements apply significant sideways force to the trainer.
An exercise may be inappropriate for the equipment or floor setup even when slower movements appear manageable.
If the trainer slides unexpectedly, stop using it until the cause has been addressed.
16. Why Adding a Non-Slip Mat Is Not Always the Answer
A common response to sliding exercise equipment is to place a mat underneath.
Although a compatible protective surface may be useful in some situations, adding an arbitrary mat can introduce new problems.
Mats can shift
A mat that grips the trainer but slides against the floor does not solve the problem.
Soft mats can deform
A thick foam mat may compress unevenly beneath a rigid base.
This can affect how the equipment sits.
Mats can fold or bunch
A loose mat edge may become a trip hazard during mounting or dismounting.
Materials can interact differently
The grip between rubber, foam, plastic, and flooring varies.
A combination that feels secure when unloaded may behave differently during exercise.
Follow manufacturer recommendations
If the manual specifies a suitable mat or floor covering, use a compatible product.
If it recommends direct contact with a particular floor surface, follow that setup.
Do not attempt to compensate for a damaged base by adding extra layers.
17. Checking for Air Leaks and Valve Problems
Inflatable trainers may gradually change condition over time.
A persistent loss of air requires attention.
Check the valve
Look for a loose or damaged closure.
Ensure it is seated according to the manufacturer’s instructions.
Inspect the dome
Check for punctures, cracks, and visible deterioration.
Examine the area near the connection between the dome and rigid platform.
Compare inflation over time
If the trainer repeatedly falls below its specified inflation level, do not simply reinflate it before every session without investigating.
Repeated air loss may indicate a problem.
Avoid homemade repairs
Do not assume that bicycle tyre patches, household glue, or adhesive tape are suitable for a balance trainer.
Repair methods depend on the material and construction.
An inappropriate repair may fail during loading.
Contact the manufacturer
If leakage persists, request the approved inspection or replacement procedure.
Do not continue performing weight-bearing exercises on equipment whose integrity is uncertain.
18. How to Clean a Balance Trainer
Cleaning helps remove sweat, dust, and other residue that can affect the condition and feel of the equipment surface.
However, different materials may require different cleaning methods.
Follow the product instructions
Use cleaning products approved for the trainer.
Some chemicals may damage rubber, polymers, adhesives, or surface finishes.
Remove ordinary residue
After exercise, check the dome and base for sweat or dust.
Clean them using the recommended method.
Avoid harsh solvents
Do not automatically use bleach, strong solvents, or household degreasers.
These substances may be inappropriate for certain materials.
Keep moisture away from vulnerable components
Avoid introducing water into valves, seams, or other areas where the manufacturer prohibits it.
Dry before storage
Allow cleaned surfaces to dry according to instructions.
Do not store a wet trainer in a sealed bag unless specifically permitted.
Inspect while cleaning
Cleaning is a convenient time to check for changes in surface texture, visible wear, and loose components.
If damage is found, stop using the equipment.
19. How to Store an Inflatable Balance Trainer
Storage conditions can affect the long-term condition of exercise equipment.
The manufacturer’s recommendations should guide the process.
Keep away from excessive heat
Avoid leaving the trainer near heaters, hot windows, or inside parked vehicles.
Temperature can influence inflatable materials and internal air conditions.
Avoid sharp objects
Store the trainer away from exposed nails, tools, sharp furniture edges, and other objects that could puncture the dome.
Prevent crushing
Do not stack heavy weights or furniture on top of the inflatable surface.
Long-term compression may be inappropriate for the equipment.
Protect the valve
Avoid placing the trainer where the valve can be struck or damaged.
Follow storage orientation instructions
Some models have particular recommendations regarding storage position.
Do not assume every trainer can be stored on its side or under heavy equipment.
Check before reuse
After long periods in storage, inspect the dome, base, valve, and inflation level before performing exercises.
20. Weight Limits and Equipment Compatibility
Every balance trainer has design limits.
These may include user-weight capacity, permitted exercises, orientation restrictions, and other usage conditions.
Maximum user weight
Check the load rating supplied by the manufacturer.
Do not exceed it.
Also consider that dynamic movements may apply forces different from ordinary standing.
Additional equipment
Some workouts involve dumbbells, resistance bands, or other accessories.
Do not assume every balance trainer is suitable for exercises involving added loads.
The trainer may have restrictions on these activities.
One user at a time
Unless the manufacturer explicitly permits another configuration, do not allow multiple people to stand on the equipment simultaneously.
Avoid using damaged products
A weight rating applies to equipment in its intended condition.
It does not make a cracked or deteriorated trainer safe for continued use.
Match exercises to the model
An exercise demonstrated using one brand or design may not be permitted on another.
Always check the intended usage.
21. Common Balance Trainer Setup Mistakes
Several mistakes occur because users focus on exercise difficulty rather than equipment setup.
Mistake 1: Overinflating the dome
Adding extra air does not automatically improve performance.
Follow the manufacturer’s inflation limits.
Mistake 2: Ignoring repeated air loss
A trainer that repeatedly becomes underinflated may have a leak.
Investigate rather than repeatedly topping it up without checking.
Mistake 3: Exercising on wet tiles
Moisture may reduce reliable floor contact.
Use a suitable dry surface.
Mistake 4: Placing the trainer on a loose rug
A moving rug adds an unnecessary source of instability.
Mistake 5: Using an arbitrary yoga mat for grip
A soft or loose mat may shift or deform.
Use only compatible surfaces.
Mistake 6: Ignoring base damage
Cracks, worn contact areas, or loose components require attention.
Mistake 7: Using an unsupported orientation
Not every balance trainer is designed for platform-up exercises.
Mistake 8: Beginning with advanced movements
Complex movements can be difficult to control without sufficient experience.
Start with permitted exercises appropriate for your ability.
Mistake 9: Setting up beside sharp furniture
Nearby obstacles increase the consequences of an unexpected loss of balance.
Mistake 10: Treating wobbling as a goal
Controlled movement is more useful than deliberately creating instability beyond your ability.
Mistake 11: Wearing unsuitable footwear
Socks, bare feet, and shoes may provide different grip characteristics.
Follow the trainer’s instructions.
Mistake 12: Ignoring fatigue
Balance control can deteriorate as you become tired.
Stop when you can no longer maintain appropriate technique.
22. When Should You Replace a Balance Trainer?
Exercise equipment should not be kept in use indefinitely regardless of its condition.
Consider replacing a trainer when its integrity can no longer be established or restored according to manufacturer guidance.
Visible structural damage
Cracks, tears, punctures, or separation between the dome and base may compromise the equipment.
Persistent air leakage
A trainer that cannot maintain its specified inflation level should not be used for weight-bearing exercise until the issue is resolved.
Damaged valve
A faulty valve may prevent reliable inflation.
Worn base
If the underside has deteriorated or no longer maintains its intended contact with suitable flooring, investigate replacement.
Significant deformation
Unexpected bulging or changes in dome shape may indicate material or inflation problems.
Unusual movement or sounds
If the equipment behaves differently from its intended condition, stop and inspect it.
Unavailable safety information
If you cannot identify the model, its load rating, or permitted usage conditions, avoid attempting demanding exercises based on assumptions.
Contact the manufacturer or retailer when possible.
23. Who Should Take Extra Precautions?
Balance exercises are not appropriate for every person in every situation.
People with certain mobility, coordination, neurological, musculoskeletal, or cardiovascular concerns may require professional guidance before using unstable exercise equipment.
People with a history of falls
An unstable surface may increase the risk of losing balance.
Professional assessment and appropriate supervision may be important.
People recovering from injury
Balance exercises sometimes appear in rehabilitation programmes.
However, the appropriate equipment and progression should be selected by a qualified healthcare or rehabilitation professional.
Do not copy a rehabilitation exercise from a video without knowing whether it suits your condition.
Older adults
Some older adults can benefit from appropriately prescribed balance training.
However, the presence of age-related fall risk or mobility limitations may require a different exercise environment or level of support.
An inflatable dome trainer should not automatically be considered a beginner rehabilitation tool.
People experiencing dizziness
If you are experiencing dizziness, vertigo, or unexplained balance difficulties, avoid unstable-surface exercise until the issue has been assessed appropriately.
Pregnant individuals
Changes in balance and physical comfort during pregnancy can affect exercise selection.
Those considering unstable-surface exercises should seek individualized guidance from an appropriate healthcare professional.
Beginners with limited confidence
There is no requirement to begin balance training on an inflatable dome.
Stable-floor balance exercises may provide a more appropriate starting point for some people.
The objective is to choose an exercise challenge you can control, not to use the most unstable equipment available.
24. A Practical Pre-Workout Balance Trainer Checklist
Before every home session, complete the following checks.
- Identify the equipment: Confirm the model and permitted exercises.
- Check inflation: Ensure the dome meets the manufacturer’s specifications.
- Inspect the surface: Look for cuts, bulges, cracks, or unusual deformation.
- Check the valve: Make sure it is secure and not leaking.
- Inspect the base: Look for damage, dust, and worn contact surfaces.
- Choose suitable flooring: Use a level, dry surface approved for the trainer.
- Avoid loose mats: Do not add unapproved layers beneath the equipment.
- Confirm orientation: Use only permitted dome-up or platform-up configurations.
- Clear the area: Remove weights, furniture obstacles, and loose objects.
- Check footwear: Follow the model’s recommendations.
- Start appropriately: Choose an exercise suitable for your ability and physical condition.
- Stop if anything changes: Unexpected slipping, air loss, or equipment movement requires reassessment.
This routine need not be complicated, but it should be consistent.
Frequently Asked Questions
1. How much should I inflate a balance trainer?
Inflate it to the level specified for your exact model.
Some manufacturers provide a dome-height measurement, while others use different instructions.
There is no universal inflation pressure suitable for every trainer.
2. Is a firmer balance trainer always better?
No.
The appropriate firmness depends on the manufacturer’s specifications.
Overinflating the dome can place unnecessary stress on its materials and change its intended response.
3. Can an underinflated balance trainer be dangerous?
Insufficient inflation may affect how the equipment supports load and responds during movement.
Do not use a trainer that falls outside its specified inflation limits.
4. Why does my balance trainer slide on tiles?
Possible causes include a slippery floor finish, dust, moisture, cleaning residue, a worn base, or an unsuitable exercise setup.
Stop using the trainer until the cause has been addressed.
5. Can I place a yoga mat underneath my balance trainer?
Only if that setup is compatible with the manufacturer’s instructions.
A soft or loose mat may shift, compress, or interfere with stable floor contact.
6. Can I use a balance trainer on carpet?
Suitability depends on the carpet and the trainer.
Thick or loose carpeting may affect support or introduce movement.
Check the approved floor surfaces in the product instructions.
7. Is it safe to turn a balance trainer upside down?
Some models permit selected exercises with the platform facing upward.
Others have restrictions.
Never assume inverted use is allowed without checking the specific manufacturer’s directions.
8. Should I use my balance trainer barefoot?
Footwear requirements vary.
Some trainers permit barefoot use for certain exercises, while others recommend suitable athletic shoes.
Follow the relevant instructions.
9. Can I jump on an inflatable balance trainer?
Only perform jumping exercises if they are explicitly permitted for the model and appropriate for your ability.
Some trainers may prohibit particular dynamic movements.
Do not use jumping as an automatic progression from basic balance work.
10. What should I do if my trainer keeps losing air?
Inspect the valve and surface according to the manufacturer’s instructions.
Persistent air loss may indicate a defect or damage.
Avoid weight-bearing exercise until the issue is resolved.
11. Does a balance trainer improve coordination?
Balance training can be used to challenge coordination and postural control.
However, results depend on the exercises, programme, individual ability, and other factors.
An inflatable trainer does not guarantee a particular improvement.
12. Is an inflatable balance trainer suitable for beginners?
Some beginner exercises may be possible with appropriate equipment, instruction, and support.
However, an unstable dome is not necessarily the best starting point for everyone.
Stable-floor exercises may be preferable for people who are not ready for unstable-surface training.
13. Can I use dumbbells while standing on a balance trainer?
Only if the trainer permits the intended exercise and the activity is suitable for your strength, balance, and experience.
Combining external loads with unstable surfaces increases the complexity of the movement.
14. How often should I check inflation?
Inspect the trainer before use and follow the manufacturer’s recommended maintenance schedule.
Recheck inflation whenever its shape or response appears different from the specified condition.
15. When should I replace my balance trainer?
Replacement may be necessary when the dome, valve, base, or structural connections are damaged, or when the product cannot maintain its intended condition.
Follow the manufacturer’s inspection and replacement guidance.
Final Thoughts
An inflatable balance trainer can add variety to a home workout routine, but correct setup is essential.
Inflation affects how the dome responds to pressure, while floor grip influences whether the supporting base remains in its intended position.
Both deserve attention before exercise begins.
A well-prepared setup includes the correct inflation level, an undamaged dome, a secure valve, an intact base, suitable flooring, and sufficient space around the equipment.
It also requires choosing movements that match your ability and the manufacturer’s permitted uses.
A balance trainer should challenge your control through its intended design—not through accidental slipping, incorrect inflation, or damaged equipment.
Avoid using extra air pressure or unsuitable floor surfaces to make exercises harder.
Instead, progress through appropriate movements while maintaining controlled technique.
For beginners, simple exercises and suitable support are more valuable than attempting advanced balance challenges immediately.
With regular inspection, proper storage, and sensible exercise selection, a balance trainer can become a practical part of a home fitness setup.
The most important habit is straightforward: check the equipment and floor before every session, and stop if the setup no longer behaves as intended.
Editorial note: This article provides general fitness equipment education. Balance trainers vary in construction, inflation requirements, permitted orientation, and load capacity. Always follow the exact manufacturer’s instructions. People with balance disorders, recent injuries, or other relevant health conditions should seek appropriate professional guidance before using unstable exercise equipment.