Foam Rolling on Carpet vs Tiles: Surface Grip and Stability
The surface beneath a foam roller changes how freely it moves. Learn what to watch for on carpet, smooth tile and workout mats, and how to avoid uncontrolled sliding during home sessions.
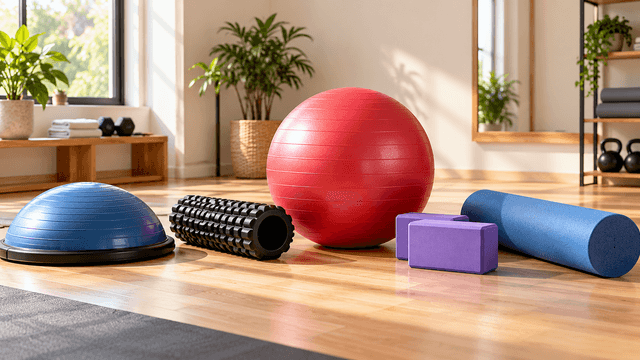
Foam rollers are widely used in home fitness routines for self-massage, mobility exercises, and post-workout recovery. They are portable, relatively simple to use, and available in different lengths, densities, and surface textures.
However, one important factor is often overlooked: the surface underneath the foam roller.
Using a foam roller on a thick carpet can feel very different from using the same equipment on polished tiles, wooden flooring, or a dedicated exercise mat.
On some carpets, the roller may move slowly or unpredictably because of the soft surface. On smooth tiles, certain rollers may travel more freely, potentially making movement difficult to control.
The problem is not simply whether the floor is hard or soft. Stability, friction, body positioning, roller construction, and exercise technique all matter.
A suitable foam-rolling setup should allow controlled movement, secure hand and foot placement, and comfortable pressure without unexpected slipping or instability.
This guide explains how carpet and tiled floors affect foam rolling, how to choose an appropriate exercise surface, which mistakes to avoid, and how to develop a more controlled home mobility routine.
What Is Foam Rolling?
Foam rolling is a technique that uses a cylindrical foam roller to apply pressure to selected muscle areas.
It is commonly described as a form of self-myofascial release or self-massage.
During a typical foam-rolling exercise, the person positions a muscle group against the roller and moves their body slowly to create pressure along the tissue.
Common areas include:
- Calves
- Hamstrings
- Quadriceps
- Gluteal muscles
- Certain upper-back muscles
- Selected shoulder and upper-body muscle groups
The exact technique depends on the body area, exercise objective, and individual physical condition.
Foam rolling may help with short-term flexibility, perceived muscle tightness, and some aspects of post-exercise soreness.
However, it is not a guaranteed treatment for injuries, chronic pain, or underlying medical conditions.
It should be viewed as an optional component of a broader movement and recovery routine rather than a replacement for appropriate exercise, rest, or professional treatment.
Why Does the Floor Surface Matter During Foam Rolling?
A foam roller works through interaction between three elements:
- Your body
- The roller
- The floor
Your body applies downward pressure onto the roller.
The roller interacts with the floor as you move.
The floor surface influences how easily the roller rotates, travels, or remains in position.
This relationship becomes particularly important during exercises where you use your hands or feet to support and move your body.
Friction Affects Movement
Friction is the resistance that occurs when two surfaces move against one another.
A foam roller may behave differently on carpet, tile, hardwood, rubber flooring, or a yoga mat.
However, friction depends on the materials involved, their texture, cleanliness, and the amount of pressure applied.
A hard floor is not automatically slippery, and carpet is not automatically stable.
Surface Softness Affects Pressure
A soft carpet or thick underlay may compress underneath the roller.
This can affect the way the roller contacts the floor and how smoothly it moves.
A firm floor generally provides less cushioning beneath the roller.
Stability Affects Exercise Control
Your hands and feet often support part of your body weight during foam rolling.
If they slide, sink excessively, or become uncomfortable, it may be harder to control the exercise.
Uneven Surfaces Can Disrupt Movement
Loose rugs, damaged floor tiles, thick carpet seams, and uneven flooring may interfere with smooth rolling.
For this reason, choosing an appropriate location is an important part of setting up a home foam-rolling routine.
Foam Rolling on Carpet: Advantages and Limitations
Carpet is common in bedrooms and living rooms, making it a convenient surface for home workouts.
It may provide cushioning for the hands and knees, but its suitability depends on carpet construction.
Potential Advantages of Carpet
1. Additional cushioning
Carpet may feel more comfortable beneath the hands, knees, or elbows during certain exercises.
This can be helpful when a movement requires supporting body weight on the floor.
2. Less direct contact with a hard surface
A carpet provides a softer environment than bare ceramic tiles.
This may improve comfort during floor transitions.
3. Convenient home setup
If you already have a suitable carpeted exercise area, you may not need to move furniture or purchase additional equipment.
4. Potentially slower roller movement
Some carpet surfaces resist roller movement more than smooth flooring.
This may make the roller feel less free-moving.
However, excessive resistance can also make movement less predictable.
Potential Limitations of Carpet
1. Thick carpet can restrict rolling
A roller may sink into a deep carpet pile or soft underlay.
This can make smooth rolling difficult.
2. Movement may become uneven
If the roller encounters different levels of resistance across the carpet, it may stop, shift, or move unevenly.
3. The roller can collect debris
Carpet fibres, dust, and hair may transfer onto textured rollers.
4. Cleaning may be more complicated
Sweat or residue left on carpet is less convenient to clean than a wipeable exercise surface.
5. Balance may feel less predictable
Soft surfaces can affect how securely your supporting hands and feet contact the floor.
The key is to evaluate the actual surface rather than assuming every carpet behaves the same way.
Foam Rolling on Tiles: Advantages and Limitations
Tiled floors are common in Indian homes because they are relatively easy to maintain and clean.
For foam rolling, tile provides a firm surface that may allow consistent roller movement.
However, some tiles are polished or become slippery when wet.
Potential Advantages of Tiled Floors
1. Firm support
Tiles generally provide a hard base beneath the foam roller.
The roller is less likely to sink into the floor surface.
2. Easy cleaning
Sweat, dust, and ordinary workout residue can usually be removed from suitable tiles using appropriate cleaning methods.
3. Predictable floor firmness
A flat, undamaged tiled surface provides a relatively consistent base.
4. Convenient for compact workout spaces
Foam rolling can be performed in a suitable open area without requiring large exercise equipment.
Potential Limitations of Tiled Floors
1. Slipping hazards
Smooth or polished tiles may offer limited traction for certain foam rollers, hands, footwear, or socks.
2. Hard contact points
Supporting the body on bare tile may feel uncomfortable around the knees, hands, or elbows.
3. Water and sweat increase risk
Moisture can reduce traction on some tiled surfaces.
4. Tile joints may affect movement
Deep grout lines, uneven tile edges, or damaged tiles can interrupt smooth rolling.
5. Uncontrolled roller travel
Certain roller-and-floor combinations may move farther or faster than expected when weight shifts.
The objective is not to avoid tiled floors entirely.
It is to confirm that the surface, equipment, and exercise technique provide sufficient control.
Carpet vs Tiles for Foam Rolling: Key Differences
| Factor | Carpet | Tiles |
|---|---|---|
| Floor firmness | Depends on pile and underlay | Generally firm |
| Roller movement | May be restricted on thick carpet | May move more freely on some surfaces |
| Hand and knee comfort | Often cushioned | May require additional padding |
| Traction | Depends on carpet texture and condition | Depends on tile finish and moisture |
| Cleaning | May retain dust or sweat | Generally easier to wipe clean |
| Stability | Soft surfaces can compress | Firm surfaces can be slippery |
| Main concern | Excessive resistance or uneven movement | Unwanted slipping or rolling |
| Best approach | Check pile depth and roller control | Check traction and floor dryness |
Neither carpet nor tile is universally the best surface for foam rolling.
A suitable exercise setup depends on the particular roller, floor condition, movement, and individual needs.
How to Check Whether Your Floor Is Suitable
Before starting a session, perform a basic equipment and surface inspection.
Step 1: Clear the Area
Move unnecessary objects away from the exercise space.
Remove items such as:
- Loose cables
- Small furniture
- Toys
- Water bottles
- Sharp objects
- Unsecured rugs
- Other workout accessories
Leave enough space for the intended movement.
Step 2: Inspect the Floor
Check for uneven surfaces, damaged tiles, loose carpet sections, or objects that could interfere with rolling.
Avoid exercising on a floor that is unstable or visibly damaged.
Step 3: Check for Moisture
Make sure the exercise area is dry.
This is particularly important on smooth flooring.
Sweat, spilled water, or cleaning-product residue may affect traction.
Step 4: Examine the Foam Roller
Inspect the roller for cracks, deep cuts, deformation, or other concerning damage.
A roller that no longer maintains its intended shape may move unpredictably.
Step 5: Test Movement Without Body Weight
Place the foam roller on the floor and gently move it by hand.
Observe whether it rolls evenly.
This can help identify obvious resistance or surface irregularities.
However, an unloaded test does not guarantee how the roller will behave when supporting body weight.
Step 6: Begin With a Low-Pressure Position
Choose a simple movement that allows substantial support through your hands and feet.
Apply pressure gradually.
Step 7: Stop if the Roller Behaves Unexpectedly
If the roller slips suddenly, becomes stuck, or changes direction unpredictably, stop and reassess the setup.
Do not continue by applying greater force.
How to Control Foam Roller Movement on Carpet
Foam rolling on carpet may require small adjustments to the setup and technique.
Choose a Suitable Carpet Area
A flat, clean, firmly attached carpet is generally preferable to a loose rug.
Avoid thick seams, uneven edges, and sections that bunch up.
Check Whether the Roller Sinks
Place the roller on the carpet and apply light pressure.
If the roller becomes heavily embedded in the carpet pile, it may be difficult to move smoothly.
A firmer exercise surface may be more suitable.
Move Slowly
Avoid sudden shifts in body weight.
Slow, deliberate movement gives you greater opportunity to notice whether the roller is catching or becoming unstable.
Use Your Hands and Feet for Support
During supported exercises, your hands and feet can help regulate the pressure applied to the roller.
Do not place your full body weight onto the equipment immediately.
Avoid Forcing a Stuck Roller
If the roller does not move smoothly, do not repeatedly push harder.
Excessive force may lead to sudden movement once resistance is overcome.
Instead, change the surface or choose a more appropriate exercise.
Keep the Carpet Clean
Dust, hair, and other debris may collect on a roller.
Clean the floor and equipment appropriately.
How to Control Foam Roller Movement on Tiles
Smooth tiled floors require particular attention to traction and body positioning.
Start With a Dry Surface
Never begin rolling on wet or visibly slippery tiles.
Dry the floor and remove any residue before exercising.
Avoid Loose Socks on Slippery Tiles
Socks may provide limited traction on some polished surfaces.
Use suitable non-slip footwear or another safe arrangement appropriate to the exercise.
Do not assume that bare feet or socks will always grip better.
Consider a Suitable Exercise Mat
A stable, non-slip exercise mat may provide additional comfort and help create a more controlled working area.
However, not every mat is suitable for foam rolling.
A very soft or unstable mat may interfere with movement.
Use a Controlled Starting Position
Begin with your body close to the floor and with secure supporting contact points.
Avoid balancing on the roller before you understand how it moves.
Keep the Roller Away From Edges
Do not position the roller where it can strike furniture, steps, walls, or other obstacles during movement.
Reduce Pressure When Necessary
Support more of your body weight through your hands or feet to reduce the pressure on the roller.
This can make a movement more manageable.
Stop if Traction Is Inadequate
If your supporting hands or feet slip, do not continue.
Change the setup or choose another suitable surface.
Should You Put a Yoga Mat Under a Foam Roller?
A yoga mat can be useful in some foam-rolling setups, particularly when extra cushioning or floor protection is needed.
However, its suitability depends on the mat’s thickness, material, grip, and construction.
Potential Benefits
A suitable mat may:
- Provide cushioning for the hands and knees
- Protect certain flooring surfaces
- Create a cleaner contact area
- Improve comfort during floor exercises
- Help organize a dedicated workout space
Possible Limitations
A yoga mat may also:
- Move across the floor
- Stretch under pressure
- Bunch up
- Compress excessively
- Change the roller’s movement
- Create unstable contact points
A mat with a textured surface is not automatically suitable for every roller.
How to Check Mat Suitability
Before using a foam roller on a yoga mat:
- Place the mat on a clean, dry floor.
- Check whether the mat remains flat.
- Confirm that the edges do not curl.
- Test whether the mat shifts under light pressure.
- Check the roller’s movement.
- Begin with a supported, low-pressure exercise.
- Stop if the mat bunches up or slides.
Use the mat only when its manufacturer permits the intended activity.
A mat should improve the setup rather than introduce another moving surface.
Yoga Mat vs Rubber Gym Flooring for Foam Rolling
Yoga mats and rubber exercise flooring serve different purposes.
| Feature | Yoga mat | Rubber gym flooring |
|---|---|---|
| Typical design | Portable floor-exercise surface | Dedicated workout flooring |
| Thickness | Varies widely | Varies widely |
| Cushioning | Depends on construction | Depends on material and thickness |
| Portability | Often rolls or folds | May be heavier or installed in sections |
| Grip | Depends on both surfaces | Depends on product and flooring |
| Foam roller compatibility | Must be checked | Must be checked |
| Cleaning | Material-specific | Material-specific |
Rubber flooring may provide a practical surface for certain home gyms, but it is not automatically better for every foam roller.
Some rubber surfaces offer substantial resistance to rolling.
Others may be too soft or textured for comfortable movement.
The same evaluation applies: stability, traction, controlled movement, and manufacturer compatibility.
Does Foam Roller Texture Affect Grip?
Foam rollers are available with smooth, ridged, or textured surfaces.
These surface designs affect how the roller contacts the body.
They may also influence interaction with the floor.
Smooth Foam Rollers
Smooth rollers have relatively even cylindrical surfaces.
They are often used for general self-massage and introductory exercises.
Their movement depends on foam density, construction, and the floor material.
Textured Foam Rollers
Textured rollers include raised patterns, ridges, or other surface features.
These may create a different pressure sensation against muscles.
However, raised patterns do not automatically improve floor traction.
Hollow-Core Rollers
Some rollers use a rigid internal core with an outer foam layer.
Their movement may differ from solid foam rollers because of their weight, construction, and surface material.
Vibrating Foam Rollers
Some products include an electronic vibration mechanism.
These may have additional operating, charging, and storage requirements.
Follow their manufacturer instructions carefully.
The Important Distinction
Foam roller texture primarily affects the contact experience and does not guarantee better control on a particular floor.
Try to evaluate surface stability and movement rather than relying on texture alone.
Does Foam Roller Density Matter on Carpet or Tile?
Density refers to how firm or compressible the foam material is.
Different densities create different sensations during use.
Soft Foam Rollers
Softer rollers may feel more comfortable for beginners or people who prefer gentler pressure.
However, their movement can be affected by how much the foam compresses under body weight.
Medium-Density Rollers
Medium-density rollers may offer a balance between firmness and comfort for some users.
Their actual behaviour depends on construction and surface materials.
Firm Foam Rollers
Firm rollers may apply more concentrated pressure.
They are not automatically more effective.
They may also feel uncomfortable if used with excessive body weight or poor positioning.
What Should Beginners Choose?
Beginners often benefit from starting with a roller that feels manageable rather than choosing the hardest available model.
A softer roller may be more comfortable, but it still requires a suitable floor and controlled technique.
No density can compensate for an unstable surface or inappropriate exercise position.
How to Position Your Body for Better Foam Roller Control
Body positioning plays a major role in how the roller moves.
An unstable position may cause problems even on a suitable floor.
Maintain Support Through Hands or Feet
Many foam-rolling exercises involve supporting some body weight through the hands or feet.
This helps regulate pressure and movement.
Avoid Sudden Weight Transfers
Do not abruptly drop your full weight onto the roller.
Begin with manageable pressure and increase gradually.
Keep Movements Controlled
Move slowly enough to maintain balance and breathing.
Avoid bouncing or jerking.
Stay Within a Comfortable Range
You do not need to roll across the entire available area of a muscle.
Focus on movements appropriate for your body and exercise instructions.
Avoid Unnecessary Joint Pressure
Foam rolling should generally target appropriate soft tissues rather than directly compressing joints or bony areas.
Stop When You Feel Sharp Pain
Intense pain is not a sign that the technique is more effective.
Stop or modify the activity when necessary.
How to Foam Roll Your Calves on a Suitable Floor
Calf rolling is a common introductory exercise.
It generally involves positioning the roller beneath the calf while using the hands and opposite leg for support.
Basic Setup
- Sit on a stable exercise surface.
- Place the roller beneath one calf.
- Keep the roller away from the ankle and knee joints.
- Position your hands behind you for support.
- Bend the opposite leg if that helps maintain control.
Controlled Movement
If comfortable, apply a manageable amount of pressure and move slowly along the calf muscle.
Avoid rolling directly over the knee joint or ankle.
Carpet Considerations
On thick carpet, the roller may resist movement.
Do not force it.
Tile Considerations
Check that your hands and supporting foot remain stable.
Use an appropriate exercise surface if needed.
When to Stop
Stop if you experience sharp pain, unusual swelling, numbness, or other concerning symptoms.
If you have an injury or vascular condition affecting the leg, seek professional guidance before foam rolling.
How to Foam Roll Your Hamstrings
The hamstrings are located at the back of the thighs.
A common foam-rolling position involves sitting with the roller beneath the thigh and using the hands for support.
Basic Setup
- Sit with adequate space around you.
- Position the roller beneath the back of the thigh.
- Keep pressure away from the back of the knee.
- Use your hands and opposite leg to control your position.
- Begin with a small, comfortable movement.
Control the Pressure
You can adjust how much weight is supported by the hands and feet.
Do not immediately place maximum body weight onto the roller.
On Carpet
If the roller becomes stuck, reassess the surface.
On Tiles
Monitor traction at the hands and supporting foot.
Avoid Aggressive Rolling
Faster movement and greater pressure are not necessarily better.
Use a comfortable technique and stop if pain occurs.
How to Foam Roll Your Quadriceps
The quadriceps are located at the front of the thighs.
Foam rolling this area commonly involves a face-down position with support through the forearms.
Basic Setup
- Place the roller beneath the front of the thigh.
- Support your upper body on your forearms.
- Maintain a controlled body position.
- Keep the roller away from the kneecap.
- Move slowly through a comfortable portion of the thigh.
Why Floor Grip Matters
During this exercise, the forearms and other supporting body parts help control movement.
If the floor or mat is slippery, the position may become unstable.
Carpet Considerations
A thick carpet may restrict the roller.
Tile Considerations
Bare tile may feel uncomfortable beneath the forearms.
A suitable stable exercise mat may help.
Avoid Lower-Back Sagging
Maintain a comfortable supported position rather than allowing excessive movement through the lower back.
If you cannot maintain control, reduce pressure or choose another exercise.
How to Foam Roll the Upper Back
Upper-back foam rolling is often performed with the roller positioned across the upper-back region while the person lies on the floor.
However, this movement requires particular attention to positioning and spinal comfort.
General Considerations
- Use an appropriate roller.
- Support your head and neck as instructed.
- Keep the movement controlled.
- Avoid excessive spinal extension.
- Do not roll directly across the neck or lower back.
- Stop if you experience pain, dizziness, or other concerning symptoms.
A physiotherapist or qualified exercise professional can help demonstrate appropriate technique.
Carpet Considerations
A soft floor may change the way the roller supports the upper back.
Tile Considerations
A hard floor may make supporting the body uncomfortable.
If using an exercise mat, confirm that it remains stable.
Important Safety Note
Direct rolling over the spine, particularly the neck or lower back, is not a suitable general recommendation.
People with osteoporosis, spinal injuries, or other relevant medical conditions should seek professional guidance before attempting upper-back rolling.
Foam Rolling Areas to Avoid
Not every part of the body is suitable for direct roller pressure.
General safety guidance recommends avoiding direct rolling over joints and bony prominences.
Areas requiring particular caution include:
- Kneecaps
- Elbows
- Ankles
- The neck
- The lower back
- Directly over the spine
- Recent injuries
- Open wounds
- Areas with significant bruising
- Areas with suspected infection
- Areas with unexplained swelling
- Areas affected by reduced sensation
Seek healthcare guidance before foam rolling if you have a recent fracture or injury, osteoporosis, a bleeding disorder, take blood-thinning medication, or have relevant vascular or neurological conditions.
The appropriate precautions depend on your medical history.
How Much Pressure Should You Use?
Foam rolling should not be a competition to tolerate the greatest possible discomfort.
The appropriate pressure depends on the muscle, roller density, body position, and individual tolerance.
Start With Light Pressure
Begin with a comfortable level of contact.
Do not immediately apply your full body weight.
Use Supporting Limbs
Adjust the load through your hands and feet.
This helps make the pressure more manageable.
Avoid Sharp Pain
A mild pressure sensation may occur, but sharp, severe, or worsening pain is a reason to stop.
Avoid Numbness or Tingling
These symptoms can indicate that the technique is unsuitable or that pressure is affecting sensitive structures.
Stop and seek guidance when necessary.
Progress Gradually
If the technique feels comfortable, gradually adjust the movement according to appropriate instructions.
More pressure does not guarantee better recovery.
How Long Should You Foam Roll Each Muscle?
There is no single duration that works for every person or exercise.
The appropriate time depends on your objective, experience, technique, and physical condition.
Many instructional routines use short, controlled periods for each muscle group.
For beginners, a brief session may be preferable to prolonged pressure.
Focus on Movement Quality
A short, controlled exercise may be more useful than several minutes of uncomfortable rolling.
Avoid Repeatedly Pressing Painful Areas
Persistent pain should not be treated as a reason to increase pressure.
Allow Time to Assess Your Response
Notice how the muscle feels during and after rolling.
If soreness or discomfort worsens, reconsider the technique.
Follow Professional Guidance
If foam rolling is part of a rehabilitation plan, use the duration recommended by your physiotherapist or healthcare professional.
Common Foam Rolling Mistakes on Carpet
Mistake 1: Using Very Thick Carpet Without Checking Movement
The roller may sink or become difficult to control.
Better approach: Choose a firmer, more predictable surface.
Mistake 2: Forcing a Roller That Gets Stuck
Excessive force may lead to a sudden movement.
Better approach: Stop and reassess the floor setup.
Mistake 3: Ignoring Loose Carpet Edges
Loose material can shift during exercise.
Better approach: Use a securely fitted, stable surface.
Mistake 4: Assuming Carpet Guarantees Traction
Soft surfaces can still create instability.
Better approach: Check your hand and foot placement.
Mistake 5: Using a Dirty Carpet
Dust and debris can transfer to the roller.
Better approach: Clean the exercise area regularly.
Common Foam Rolling Mistakes on Tiles
Mistake 1: Exercising on Wet Tiles
Moisture may reduce traction.
Better approach: Dry the surface thoroughly before starting.
Mistake 2: Wearing Slippery Socks
Some socks provide little grip on polished flooring.
Better approach: Use suitable footwear or another stable arrangement.
Mistake 3: Ignoring Hand Placement
Hands support body weight during many foam-rolling exercises.
Better approach: Confirm that your hands remain stable.
Mistake 4: Rolling Too Quickly
Rapid movement can reduce control.
Better approach: Use slow, deliberate motions.
Mistake 5: Placing a Loose Mat Under the Roller
An unsecured mat can shift or bunch up.
Better approach: Use only a suitable, stable exercise surface.
How to Prevent Your Foam Roller From Slipping
If your roller moves unexpectedly, the solution depends on why it is slipping.
Check the Floor Condition
Remove moisture, dust, or other residue.
Inspect the Roller Surface
A damaged or worn outer layer may affect how the roller behaves.
Assess the Exercise Mat
If you use a mat, check whether it is moving against the floor.
Review Your Body Position
Sudden weight shifts may cause uncontrolled movement.
Reduce the Pressure
Support more weight through your hands or feet.
Use a Different Location
If the surface remains unpredictable, choose another suitable exercise area.
Stop Using Damaged Equipment
Do not attempt to compensate for equipment damage by changing your technique.
Replace the roller when necessary.
Can You Use a Foam Roller on a Loose Rug?
A loose rug is generally not an ideal default surface for foam rolling.
Because it is not securely attached to the floor, it may shift or bunch up.
This can affect the position of the roller and your supporting limbs.
Even if the rug feels soft and comfortable, movement underneath it may create instability.
For a more predictable setup, use a stable floor or exercise surface that remains securely in place.
Do not assume a thin rug becomes safe simply because a foam roller is placed on top.
What Type of Foam Roller Is Best for Home Use?
A suitable home foam roller should match your experience, physical condition, available space, and intended exercises.
Roller Length
Longer rollers may support a wider range of positions.
Shorter rollers can be more portable and easier to store.
However, a compact roller may not suit every exercise.
Roller Diameter
Diameter affects how the roller positions the body above the floor.
A larger diameter may change the pressure and support required.
Choose according to your intended use and comfort.
Foam Density
Softer rollers may provide a gentler experience.
Firmer rollers may create more concentrated pressure.
Surface Texture
Smooth rollers provide relatively even contact.
Textured designs create different pressure sensations.
Neither is automatically better for every user.
Construction Quality
Inspect seams, outer foam, and structural integrity.
Avoid products showing visible damage.
Floor Compatibility
Consider the surface on which you intend to use the roller.
A roller that feels manageable on one floor may behave differently on another.
Cleaning Requirements
Choose a product that can be maintained using the manufacturer’s recommended method.
Price and Value
A higher price does not automatically mean better recovery benefits or safer operation.
Suitability and correct use matter more than appearance or marketing claims.
How to Set Up a Small Foam Rolling Area at Home
You do not need a large home gym to use a foam roller.
However, adequate space is important.
Step 1: Choose a Clear Location
Select an area with enough room for the intended exercise.
Avoid narrow spaces beside sharp furniture edges.
Step 2: Check the Floor
Choose a stable, level surface.
Remove loose objects and moisture.
Step 3: Decide Whether You Need a Mat
Use a suitable exercise mat only when it improves comfort and control.
Step 4: Inspect Your Equipment
Check the roller for cracks, distortion, or damage.
Step 5: Prepare Comfortable Clothing
Wear clothing that allows movement without excessive restriction.
Avoid loose accessories that could become caught beneath the roller.
Step 6: Begin With a Simple Exercise
Start with a muscle group and position you can control comfortably.
Step 7: Keep Movements Slow
Focus on stability rather than covering a large distance.
Step 8: Reassess the Surface
If movement becomes unpredictable, stop and change the setup.
Cleaning a Foam Roller After Use
Regular cleaning helps remove sweat, dust, and contact residue.
The appropriate method depends on the roller’s material and construction.
Step 1: Read the Manufacturer’s Instructions
Some foam materials are sensitive to certain cleaning chemicals.
Follow the recommended method.
Step 2: Remove Loose Debris
Use a suitable soft cloth to remove dust, hair, and surface particles.
Step 3: Wipe the Roller
If permitted, use a lightly dampened cloth and an appropriate mild cleaning solution.
Avoid soaking the roller unless instructed.
Step 4: Pay Attention to Textured Sections
Grooves and raised patterns may collect residue.
Clean them gently without damaging the foam.
Step 5: Remove Cleaning Residue
Follow the manufacturer’s directions for removing any cleaning solution.
Step 6: Allow Complete Drying
Let the roller dry appropriately before storage.
Avoid direct high heat.
Step 7: Inspect for Damage
Check whether cleaning revealed cracks, loose foam, or other deterioration.
Do not continue using structurally damaged equipment.
How to Store a Foam Roller Properly
Storage practices can help preserve the roller’s condition.
Keep Away From Excessive Heat
Avoid storing foam rollers near heaters or inside hot vehicles.
Protect From Prolonged Sunlight
Certain materials may deteriorate with repeated UV exposure.
Follow the product’s storage instructions.
Avoid Heavy Compression
Do not place heavy objects on top of the roller for long periods if doing so may deform it.
Store on a Clean Surface
Keep the roller away from dirt, water, and abrasive objects.
Keep Away From Sharp Equipment
Sharp metal edges can damage the foam.
Inspect Before Every Session
Check that the roller retains its intended shape and surface condition.
Does Foam Rolling Replace Stretching?
Foam rolling and stretching are different practices.
Foam rolling applies pressure to selected muscle areas.
Stretching generally involves moving a joint or muscle group into an appropriate lengthened position.
Both may be included in a mobility routine, depending on personal needs.
However, neither is automatically required for everyone.
A balanced exercise program may also include:
- Strength training
- Appropriate warm-ups
- Mobility exercises
- Regular physical activity
- Recovery time
- Gradual progression
Foam rolling should not be treated as a substitute for addressing underlying strength, movement, or medical concerns.
Is Foam Rolling Suitable for Everyone?
No.
Although foam rolling is commonly used by healthy adults, certain conditions require caution or professional advice.
Consult a healthcare professional before foam rolling if you have:
- A recent fracture
- An acute injury
- Osteoporosis or significant bone fragility
- Known vascular conditions
- A suspected blood clot
- Significant unexplained swelling
- Reduced sensation
- An active infection
- An open wound
- A bleeding disorder
- Medication that increases bleeding risk
- A recent surgical procedure
- Persistent unexplained pain
Foam rolling over an injured or medically sensitive area may be inappropriate.
Stop immediately if you experience sharp pain, numbness, tingling, dizziness, or worsening symptoms.
For rehabilitation or chronic pain management, follow guidance from a qualified physiotherapist or healthcare professional.
A Simple Beginner Foam Rolling Routine
The following is an illustrative approach for a healthy adult who has no relevant injury or contraindication and is already familiar with basic supported positions.
It is not a prescribed treatment program.
Phase 1: Prepare the Surface
Check the floor, roller, and available space.
Confirm that supporting hands and feet will remain stable.
Phase 2: Begin With Gentle Calf Rolling
Use a supported seated position.
Apply light pressure and move slowly along the calf muscle, avoiding the knee and ankle joints.
Stop if the movement causes pain.
Phase 3: Try Supported Hamstring Rolling
If comfortable, position the roller beneath the back of the thigh.
Keep the movement small and controlled.
Support your body with your hands and opposite leg.
Phase 4: Consider Quadriceps Rolling
If you can comfortably maintain an appropriate supported position, use a gentle quadriceps exercise.
Avoid excessive pressure and keep the roller away from the knee.
Phase 5: Finish and Assess
Stop the session and notice how your body feels.
A foam-rolling session does not need to be long to serve as a movement or self-massage activity.
Do not add harder exercises simply because the first few movements felt easy.
If you are uncertain about positioning, ask a qualified exercise professional to demonstrate the technique before attempting it independently.
Troubleshooting Common Foam Rolling Problems
Problem: The Roller Does Not Move on My Carpet
Possible cause: Thick carpet pile or soft underlay is restricting movement.
What to try: Use a firmer, stable surface rather than forcing the roller.
Problem: The Roller Moves Too Quickly on My Tiles
Possible cause: The roller-and-floor combination allows relatively free movement, or body positioning is difficult to control.
What to try: Reduce pressure, slow the movement, and evaluate a suitable stable exercise surface.
Problem: My Hands Slip During Rolling
Possible cause: Inadequate traction, sweat, or unsuitable hand placement.
What to try: Stop, dry the surface, and adjust the setup.
Problem: My Knees Hurt Against the Floor
Possible cause: Hard contact points or an unsuitable exercise position.
What to try: Use appropriate stable cushioning or choose another exercise.
Problem: The Roller Gets Stuck on a Yoga Mat
Possible cause: The mat compresses, stretches, or creates excessive resistance.
What to try: Change the mat or surface rather than applying more force.
Problem: I Feel Sharp Pain While Rolling
Possible cause: Excessive pressure, unsuitable positioning, injury, or another underlying issue.
What to try: Stop immediately. Seek professional advice when necessary.
Problem: My Roller Looks Damaged
Possible cause: Wear, impact, storage damage, or material deterioration.
What to try: Remove the roller from use if its structural condition is uncertain.
Frequently Asked Questions
1. Can I use a foam roller on carpet?
Yes, if the carpet provides a stable surface and allows controlled movement.
Thick or uneven carpet may make rolling difficult.
2. Is foam rolling on tiles safe?
It may be suitable when the tiles are dry, stable, and provide sufficient traction.
Avoid slippery or damaged surfaces.
3. Which is better for foam rolling: carpet or tiles?
Neither is universally better.
Carpet may offer cushioning but restrict movement, while tiles provide firmness but may present slipping concerns.
4. Should I use a yoga mat under my foam roller?
A suitable mat may improve comfort and stability.
However, some mats compress, slide, or bunch up.
Check whether the mat is appropriate for the activity.
5. Can a foam roller damage floor tiles?
Potential surface damage depends on the floor finish, roller materials, dirt, and how the equipment is used.
Keep the roller and floor clean and follow flooring-care instructions.
6. Can I foam roll on hardwood flooring?
A suitable hardwood surface may be usable, but traction, floor protection, and roller movement should be checked.
Avoid slippery or damaged areas.
7. Why does my foam roller slip on tiles?
Slipping can result from the combination of roller material, tile finish, moisture, and body positioning.
Reassess the setup before continuing.
8. Why does my foam roller get stuck on carpet?
A thick carpet pile or soft underlay may resist roller movement.
Choose a more appropriate surface if movement becomes difficult to control.
9. Is a textured foam roller better on slippery floors?
Not necessarily.
Texture does not guarantee adequate floor traction.
The entire roller-and-floor combination matters.
10. Is a firm foam roller better than a soft one?
Not for everyone.
Firmness affects pressure and comfort.
Choose a roller appropriate for your experience and intended use.
11. Can beginners use foam rollers?
Many healthy beginners can learn basic supported foam-rolling exercises.
Start gently and seek appropriate instruction.
12. Should foam rolling hurt?
You may feel pressure or mild discomfort, but sharp or severe pain is not a goal.
Stop if symptoms are concerning.
13. Can I foam roll my lower back?
Direct lower-back rolling is generally not recommended as an unsupervised technique.
Seek guidance from a qualified professional for back-related concerns.
14. Can I foam roll directly over my knees?
No.
General foam-rolling safety guidance recommends avoiding direct pressure over joints and bony structures.
15. How often should I foam roll?
Frequency depends on your routine, physical condition, and response.
There is no universal requirement to foam roll every day.
16. How long should a foam-rolling session last?
Duration varies.
Begin with brief, controlled movements and follow professional guidance when appropriate.
17. Can foam rolling cure muscle injuries?
No.
Foam rolling should not be treated as a cure for muscle injuries or a substitute for medical assessment.
18. Can I use a foam roller after exercise?
Some people include foam rolling in a post-workout routine.
However, suitability depends on comfort, technique, and physical condition.
19. Do I need expensive gym flooring for foam rolling?
Not necessarily.
A stable, clean, suitable floor may be sufficient.
The important factors are traction and controlled movement.
20. When should I replace my foam roller?
Replace it when structural damage, significant deformation, or other deterioration affects its suitability.
Follow manufacturer guidance.
Final Foam Rolling Surface Safety Checklist
Before beginning your next session, check the following:
- Choose a stable, level floor.
- Remove loose objects and obstacles.
- Confirm the surface is dry.
- Avoid loose rugs or unstable mats.
- Inspect the foam roller for damage.
- Check whether the roller moves predictably.
- Ensure hands and feet have suitable traction.
- Use appropriate cushioning when needed.
- Begin with low-pressure, supported movements.
- Avoid sudden weight shifts.
- Keep movements slow and controlled.
- Avoid rolling directly over joints and bones.
- Do not force painful positions.
- Avoid direct rolling over the neck and lower back.
- Stop if the roller slips unexpectedly.
- Stop if you experience sharp pain or unusual symptoms.
- Follow manufacturer instructions.
- Clean the roller after use as directed.
- Store equipment appropriately.
- Seek professional guidance when necessary.
Final Thoughts
Foam rolling can be a useful addition to a home mobility or recovery routine, but the floor beneath the roller deserves attention.
Carpet and tiles can create very different exercise experiences.
A thick carpet may restrict movement and allow the roller to sink into the surface.
Smooth tiles provide a firmer base but may require greater attention to traction, particularly when the floor is polished or damp.
Neither surface is automatically suitable or unsuitable.
The important consideration is whether the roller moves predictably and whether you can maintain secure, comfortable body positioning.
Before every session, inspect the floor, check the roller, and begin with gentle supported movements.
If the roller becomes stuck, slips unexpectedly, or requires excessive force, stop and change the setup.
Avoid the temptation to increase pressure or movement speed to overcome poor surface conditions.
Remember that foam rolling is not about tolerating maximum discomfort.
It should involve controlled pressure on appropriate muscle areas while avoiding unnecessary stress on joints, bones, and sensitive structures.
The best surface for foam rolling is the one that provides stable support, predictable movement, adequate traction, and a comfortable exercise experience for your needs.
By focusing on floor preparation, correct equipment selection, and controlled technique, you can make home foam rolling more manageable without unnecessarily complicated equipment.
Physical Glow editorial note: This article provides general fitness and equipment-safety information. Foam rolling is not suitable for every medical condition or injury. Follow manufacturer instructions and consult a qualified healthcare or exercise professional if you have pain, mobility limitations, vascular conditions, bone fragility, or other relevant health concerns.
References and Further Reading
- Hospital for Special Surgery — Foam Roller Exercises for the Whole Body: https://www.hss.edu/health-library/move-better/foam-roller-exercises
- Cleveland Clinic — Should You Try Foam Rolling?: https://health.clevelandclinic.org/foam-rolling
- OrthoBethesda — Foam Rolling Exercises: https://www.orthobethesda.com/physical-therapy/patient-education/foam-rolling-exercises/
- Franciscan Health — How to Use a Foam Roller: https://www.franciscanhealth.org/community/blog/how-to-use-a-foam-roller