How to Choose the Right Concealer for Your Skin
Learn how to choose concealer for your skin and makeup needs, with practical guidance on coverage, undertone, shade, texture and where you plan to use it. This beginner-friendly guide helps you make a clear, informed choice without unnecessary complexity.
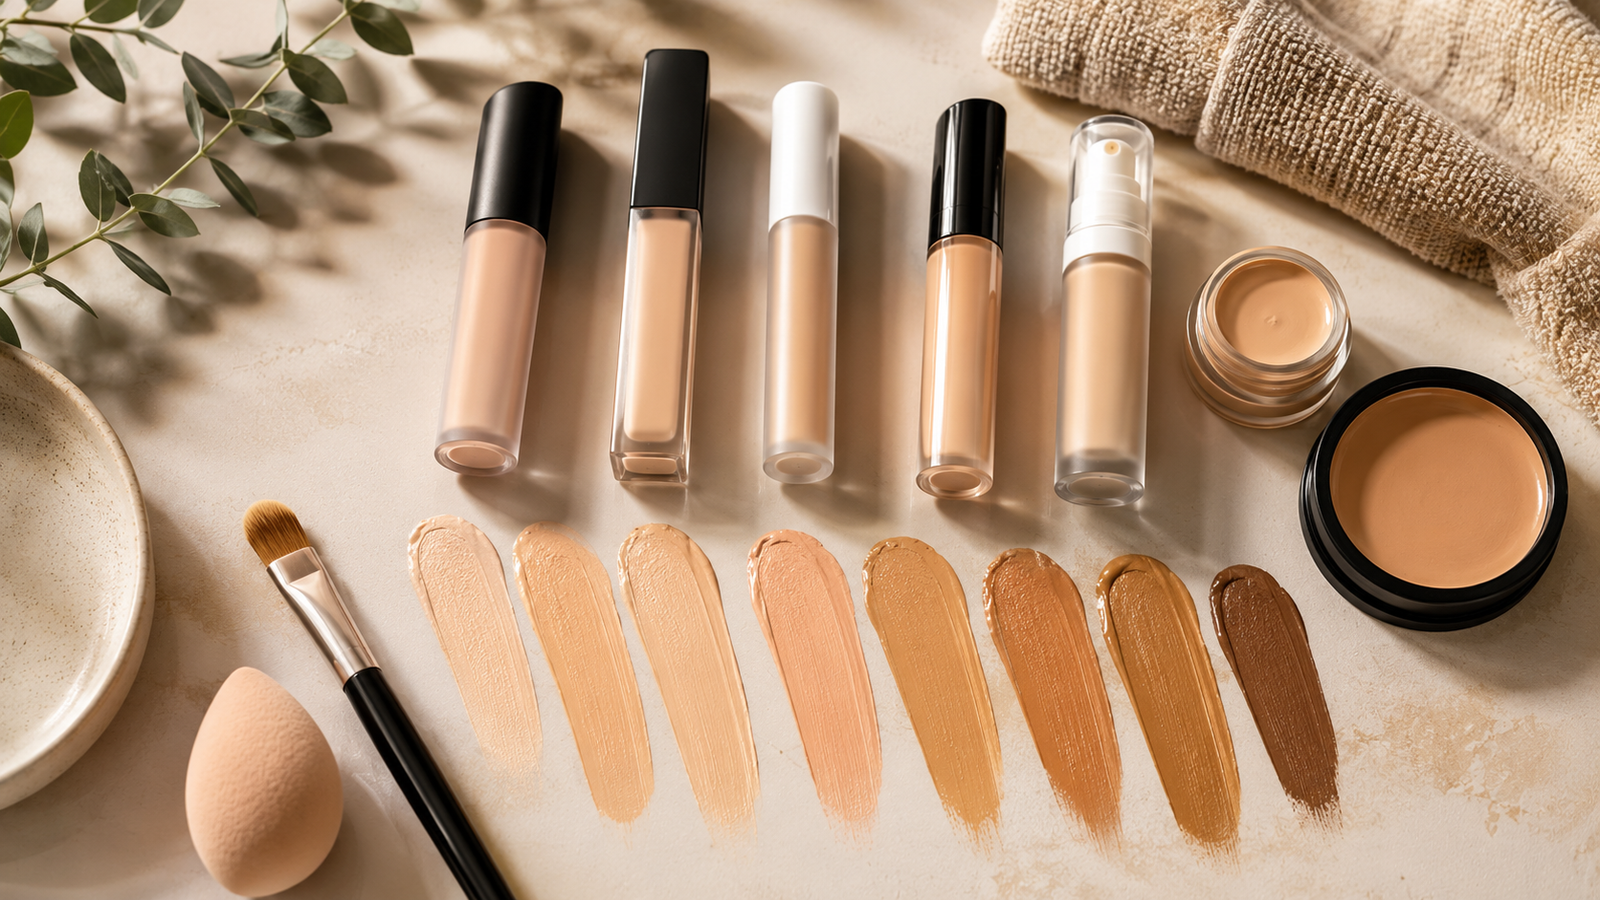
Concealer can be one of the most useful products in a makeup routine because it allows you to add coverage only where you need it.
It can help reduce the appearance of:
- dark circles;
- blemishes;
- redness;
- pigmentation;
- acne marks;
- uneven tone.
But concealer can also look heavy very quickly when the:
- shade is wrong;
- formula is too dry;
- coverage is excessive;
- undertone does not match;
- product is applied too thickly.
The most useful approach is:
identify what you want to conceal → choose the right shade and undertone → match the formula to the area → apply a small amount → build only where needed
There is no single concealer that is automatically best for:
- under-eyes;
- acne;
- pigmentation;
- highlighting.
The right concealer depends on what you want it to do.
What Does Concealer Actually Do?
Concealer is a complexion product containing pigments that reduce the visible contrast between a specific area and the surrounding skin.
For example, it can make:
- a red blemish look closer to your skin tone;
- a dark under-eye area look brighter;
- a brown mark blend more evenly with the surrounding complexion.
Concealer does not remove these concerns.
It temporarily reduces how visible they appear.
That distinction matters because makeup is a cosmetic tool, not treatment.
Concealer vs Foundation
Foundation is generally designed to create more even coverage across larger areas of the face.
Concealer is more targeted.
Foundation
Usually covers:
- most or all of the face.
Concealer
Usually covers:
- smaller areas;
- specific marks;
- under-eyes;
- redness.
You can use:
- foundation + concealer;
- concealer alone;
- foundation alone.
There is no rule requiring both.
Do You Need Concealer?
No.
If your foundation gives you enough coverage, concealer may be unnecessary.
You may also prefer to leave:
- freckles;
- under-eye shadows;
- blemishes;
partially visible.
But concealer is useful when you want to keep the rest of the complexion relatively light while increasing coverage only where needed.
This often produces a more natural result than using heavy foundation everywhere.
Start With What You Want to Conceal
This is the most important first step.
You may need concealer for:
- Under-eye darkness
- Blemishes
- Redness
- Brown pigmentation
- Post-acne marks
- Highlighting certain areas
Each concern may require a different shade or texture.
Concealer for Under-Eyes
Under-eye concealer usually needs to:
- brighten;
- reduce darkness;
- blend smoothly;
- remain flexible.
The under-eye area has relatively thin skin and constant movement.
That means formulas that are extremely:
- dry;
- thick;
- matte;
may emphasize:
- fine lines;
- texture.
For many people, a flexible medium-coverage concealer works better than the heaviest possible formula.
Concealer for Blemishes
Blemishes are different.
Here you generally want:
- accurate skin-tone match;
- stronger coverage;
- good staying power.
A blemish concealer should usually blend into the surrounding skin rather than brighten the area.
Using a concealer that is too light can make a raised spot more noticeable.
Concealer for Redness
Red areas may include:
- around the nose;
- acne;
- post-inflammatory redness.
A skin-matched concealer may be enough.
For stronger redness, a tiny amount of:
- green colour corrector;
can reduce the visible red tone before skin-coloured concealer is applied.
You rarely need a thick layer of green product.
Concealer for Dark Spots
Brown or grey-brown marks can be more difficult to cover.
A high-coverage concealer with an accurate undertone match can work well.
If the pigmentation remains visible through the concealer, a colour corrector may help.
The right correction depends on:
- skin depth;
- colour of pigmentation.
Concealer for Acne Marks
Post-acne marks may be:
- red;
- pink;
- brown;
- grey-brown.
Treat the colour rather than simply assuming all acne marks need the same concealer.
For example:
- red mark → skin-matched concealer or subtle green correction;
- brown mark → accurate skin match or warm correction if needed.
Concealer for Highlighting
Some people use concealer to deliberately brighten areas such as:
- under-eyes;
- centre of forehead;
- bridge of nose;
- chin.
In this case, the concealer may be slightly lighter than the foundation.
But very light concealer can look:
- stark;
- grey;
- unnatural.
For everyday makeup, one shade slightly brighter is often enough.
Skin Depth Comes First
Concealer shade should broadly match your complexion depth.
Common categories include:
- fair;
- light;
- medium;
- tan;
- deep;
- very deep.
These are only broad descriptions.
Within each category there can be many differences in undertone.
A concealer can be the correct depth but still look wrong because the undertone does not match.
What Is Concealer Undertone?
Undertone refers to the subtle colour underneath the visible skin tone.
Common undertone categories include:
- warm;
- cool;
- neutral;
- olive.
Concealers may also use descriptions such as:
- golden;
- yellow;
- peach;
- pink;
- beige;
- neutral;
- olive.
Matching undertone can make concealer disappear more naturally into the skin.
Warm Undertones
Warm skin may lean:
- golden;
- yellow;
- peach.
Concealers described as:
- warm;
- golden;
- yellow;
may match well.
But every brand labels shades differently.
Never trust the shade name alone.
Cool Undertones
Cool skin may lean:
- pink;
- rosy;
- bluish.
Concealers with:
- pink;
- rosy;
- cool-neutral undertones;
may blend better.
Neutral Undertones
Neutral skin contains a balance between warm and cool tones.
Neutral-labelled concealers are often useful.
But “neutral” varies significantly between brands.
Some neutral shades still lean:
- peach;
- yellow;
- pink.
Testing is useful whenever possible.
Olive Undertones
Olive skin can have a subtle:
- green;
- golden-green;
- muted quality.
Finding concealer can be difficult because many products are strongly:
- yellow;
- orange;
- pink.
An olive or neutral-olive concealer may match better.
If concealer often looks unusually orange despite being the correct depth, undertone may be the issue.
Should Under-Eye Concealer Match Your Skin Exactly?
It can.
A skin-matched concealer gives the most natural effect.
If you want additional brightness, choose something slightly lighter.
For example:
skin-matched concealer → natural correction
slightly lighter concealer → brighter under-eye
Avoid going several shades lighter unless you specifically want a dramatic makeup effect.
Why Very Light Concealer Can Look Grey
Under-eye darkness may contain:
- blue;
- purple;
- brown;
- grey tones.
Putting a very light beige product directly over strong darkness may create an:
- ashy;
- grey result.
This happens because light pigment alone does not always neutralize the underlying colour.
Colour correction can sometimes work better than simply choosing a lighter concealer.
What Is Colour Correcting?
Colour correction uses one colour to reduce the appearance of another.
In makeup, opposite or balancing colour families are used strategically.
Common corrector colours include:
- peach;
- orange;
- green;
- yellow.
The goal is not to visibly paint the face another colour.
Use the smallest amount needed to reduce the unwanted tone.
Peach Corrector
Peach corrector can help neutralize:
- blue;
- purple;
under-eye darkness.
It is often useful for:
- fair;
- light;
- some medium skin tones.
Deeper complexions may require a stronger orange-peach tone.
Orange Corrector
Orange corrector can help neutralize:
- deep blue;
- grey;
- brownish under-eye darkness;
particularly on medium-to-deep skin.
Use sparingly.
Too much orange requires more concealer on top and can create unnecessary thickness.
Red Corrector
Deeper red or red-orange correction may sometimes be used on very deep complexions for strong:
- grey;
- blue pigmentation.
This is usually more useful for professional or high-coverage makeup.
Again, use only enough to correct.
Green Corrector
Green helps reduce the appearance of:
- redness.
Useful for:
- red blemishes;
- redness around nose;
- localized red areas.
Do not cover the entire face in green unless there is a specific reason.
Yellow Corrector
Yellow-toned correctors may help with:
- mild purple tones;
- dullness.
Their effect is usually subtler than peach or orange.
Do You Need a Colour Corrector?
Not always.
If normal concealer covers the concern well, correction is unnecessary.
Use a corrector only when:
- darkness still shows through;
- redness remains visible;
- concealer becomes too thick because you keep layering it.
Correction can allow you to use less concealer.
Concealer Coverage Levels
Concealers generally offer:
- sheer;
- medium;
- full coverage.
Sheer Coverage
Best for:
- minimal makeup;
- mild under-eye darkness;
- slight redness.
It looks more natural but will not fully conceal strong pigmentation.
Medium Coverage
This is the most versatile category.
Useful for:
- under-eyes;
- mild blemishes;
- everyday correction.
You can often build it where needed.
Full Coverage
Best for:
- strong pigmentation;
- blemishes;
- scars;
- high-glam makeup.
But full coverage requires careful application.
Too much can look:
- heavy;
- dry;
- obvious.
More Coverage Is Not Automatically Better
Heavy concealer can sometimes make an imperfection more visible by adding:
- texture;
- thickness;
- contrast.
Use the least amount of product needed to achieve the result.
This is especially important around:
- under-eyes;
- raised blemishes;
- dry skin.
Liquid Concealer
Liquid concealer is the most common format.
It usually comes with:
- doe-foot applicator;
- brush applicator.
Advantages include:
- easy blending;
- wide finish range;
- versatile coverage.
It works for most areas of the face.
Who Should Choose Liquid Concealer?
Nearly everyone can use it.
It is especially useful for:
- under-eyes;
- everyday makeup;
- large areas of mild pigmentation.
Choose formula finish according to your skin and concern.
Cream Concealer
Cream concealers are usually thicker.
They may come in:
- pots;
- palettes;
- sticks;
- compacts.
They often provide:
- higher coverage;
- stronger spot concealing.
Cream formulas can work particularly well on:
- blemishes;
- pigmentation.
But heavy cream can crease around the eyes if overapplied.
Concealer Stick
Stick concealers are:
- portable;
- concentrated;
- easy for targeted application.
They can be useful for:
- blemishes;
- dark spots;
- quick touch-ups.
Some stick formulas may be too dry for under-eyes.
Concealer Pot
Pot concealers are usually concentrated.
They often work well for:
- spot concealing;
- pigmentation;
- professional makeup.
Because they are thicker, use very small amounts.
Serum Concealer
Serum concealers are generally lightweight and fluid.
They may provide:
- hydration;
- flexible coverage;
- natural finish.
These can work well for:
- dry under-eyes;
- mature skin;
- light everyday makeup.
But thin texture does not always mean low coverage.
Some serum formulas are surprisingly pigmented.
Matte Concealer
Matte concealers set with little shine.
They can offer:
- strong longevity;
- oil control.
Useful for:
- oily skin;
- blemishes;
- humid conditions.
Under the eyes, very matte formulas may emphasize dryness or lines in some people.
Natural-Finish Concealer
A natural finish sits between:
- matte;
- dewy.
This is often the easiest finish for everyday use.
It works well for:
- under-eyes;
- spot concealing;
- normal skin.
Radiant Concealer
Radiant concealers contain light-reflective qualities.
They can make under-eyyes appear:
- brighter;
- fresher.
They are often useful for dry or mature skin.
But very reflective formulas can make:
- raised blemishes;
- textured acne;
more noticeable.
Use radiant concealer where light reflection is beneficial.
Dewy Concealer
Dewy formulas have a more visibly luminous finish.
They can look beautiful under the eyes.
But they may:
- move more;
- crease more;
- need setting.
For oily skin, choose strategically.
Concealer for Dry Skin
Dry skin usually benefits from:
- flexible liquid formulas;
- serum concealers;
- natural or radiant finishes.
Avoid unnecessary heavy powder over the top.
Skin preparation is important.
Use:
- moisturizer;
- appropriate eye cream if you already use one.
Allow skincare to settle before concealer.
Concealer for Oily Skin
Oily skin may benefit from:
- long-wear;
- natural-matte;
- matte formulas.
For blemishes, look for good adhesion.
Setting with a small amount of powder may improve longevity.
But do not automatically apply thick powder over the whole face.
Concealer for Combination Skin
You may prefer different techniques in different areas.
For example:
Under-Eyes
Flexible natural-finish concealer.
Blemishes
Long-wear matte concealer.
There is nothing wrong with owning two concealers for different purposes.
Concealer for Sensitive Skin
Choose according to your known sensitivities.
Consider:
- fragrance-free formulas;
- simpler formulations.
Stop using a concealer if it causes:
- burning;
- itching;
- persistent redness;
- swelling.
Makeup should not create discomfort.
Concealer for Acne-Prone Skin
Any formula can potentially work.
The most important factors include:
- good shade match;
- minimal rubbing;
- hygienic tools;
- proper removal.
Avoid repeatedly touching an inflamed blemish with the applicator if you are concerned about contaminating the product.
You can place some concealer on:
- clean hand;
- palette;
and apply with a clean brush.
Does Concealer Cause Acne?
A particular product may contribute to breakouts in a particular person, but there is no single ingredient that causes acne for everyone.
Possible factors include:
- heavy occlusive formulas;
- individual sensitivity;
- dirty tools;
- incomplete makeup removal.
If a new concealer consistently causes breakouts where you apply it, discontinue and reassess.
Concealer for Mature Skin
Mature skin may have more visible:
- fine lines;
- dryness;
- texture.
The most flattering concealer is often:
- flexible;
- lightweight;
- medium coverage.
Using a very thick layer can exaggerate lines.
A good strategy is:
small amount → targeted placement → minimal powder
Under-Eye Fine Lines
Almost everyone has some natural under-eye lines.
Concealer will move with facial expressions.
The goal is not necessarily to make every line invisible.
Use:
- thin layers;
- flexible formula;
- strategic setting.
Excess product often creases more than a small amount.
Concealer and Dark Circles
Dark circles may arise from several factors, including:
- genetics;
- pigmentation;
- visible blood vessels;
- facial structure;
- shadowing.
Makeup can reduce their appearance.
It cannot treat every cause.
A concealer may work best when combined with:
- corrector;
- strategic placement.
Structural Shadows Under the Eyes
Some darkness is caused by facial anatomy rather than pigmentation.
For example, a hollow under the eye can create a shadow.
Concealer can brighten the area, but it cannot physically change the underlying structure.
This is why some dark circles remain partially visible even with strong coverage.
Where Should You Apply Under-Eye Concealer?
You do not necessarily need a large triangle of concealer.
A more targeted method is often enough.
Apply primarily where darkness is strongest, such as:
- inner corner;
- tear trough area;
- outer corner if needed.
Blend outward.
This reduces unnecessary product.
The Large Concealer Triangle Technique
This technique uses concealer from the under-eye down toward the cheek.
It can create:
- strong brightening;
- full-glam effect.
But it also uses significantly more product.
For everyday makeup, targeted application often looks more natural.
Inner-Corner Concealing
The inner corners near the nose can appear particularly dark.
A small amount of concealer here can make a surprisingly large difference.
This is one of the most efficient ways to brighten the eye area.
Concealing Blemishes Correctly
For a blemish:
- Match the concealer closely to the surrounding skin.
- Apply a tiny amount directly to the spot.
- Allow it to sit briefly if the formula benefits from setting.
- Tap the edges.
- Avoid blending the centre away completely.
The goal is to soften the perimeter without removing coverage from the blemish.
Raised Blemishes
Makeup can correct colour.
It cannot remove physical height.
If a pimple is raised, applying very thick concealer may emphasize:
- texture;
- edges.
Correct the redness, but accept that some texture may remain visible.
Concealing Redness Around the Nose
This area often benefits from:
- skin-matched concealer;
- small brush.
Apply only where redness appears.
Blend into surrounding skin.
Setting lightly may improve longevity because the nose area can become oily.
Concealing Hyperpigmentation
Dark marks often need:
- more coverage;
- accurate undertone.
Apply concealer directly onto the mark.
Then feather the edges.
If pigmentation still appears grey through the concealer, consider a subtle warm corrector underneath.
Concealing Melasma
Melasma may appear as larger irregular patches of pigmentation.
Makeup can camouflage it, but repeated heavy concealer layers may become obvious.
A better method may be:
- Colour correction where needed.
- Thin layer of foundation.
- Targeted full-coverage concealer.
- Light setting.
Do not disturb sunscreen underneath excessively.
Sun protection remains important for pigmentation management.
Concealing Acne Scars
Acne scars can involve:
- colour;
- texture;
- both.
Concealer can reduce colour differences.
It cannot completely hide:
- indentations;
- raised scars.
Matte or natural finishes may draw less attention to texture than highly reflective formulas.
Concealer Before or After Foundation?
Both methods can work.
Concealer After Foundation
This is usually the most efficient method.
Why?
Foundation may already cover some:
- redness;
- pigmentation.
Then you need less concealer.
A simple sequence:
foundation → concealer
works for most people.
Concealer Before Foundation
This can work when:
- colour correcting;
- covering strong pigmentation.
For example:
corrector → foundation → concealer
can create layered but controlled coverage.
If you apply heavy concealer first and then blend foundation aggressively, you may remove it.
Concealer Without Foundation
This can create a natural complexion.
Apply concealer only to:
- under-eyes;
- blemishes;
- redness.
Blend the edges carefully.
The shade match becomes particularly important because there is no foundation to connect the concealer with the rest of the face.
How to Choose Concealer Shade Without Foundation
If wearing concealer alone, prioritize:
exact skin match
rather than brightening.
This helps the product disappear into bare skin.
You can use a second brighter concealer for under-eyes if desired.
Should Concealer Be One Shade Lighter?
Only for brightening.
For blemishes and pigmentation:
match your skin closely.
For under-eyes:
- exact match → natural;
- slightly lighter → brighter.
The common rule that every concealer should be one or two shades lighter is too simplistic.
Can You Use One Concealer for Everything?
Yes, if:
- the shade works;
- formula is versatile.
A medium-coverage natural-finish concealer can often work for:
- under-eyes;
- minor blemishes;
- redness.
But one product may not be perfect for every area.
For example:
- radiant under-eye concealer;
- matte spot concealer;
can be a useful combination.
How to Test Concealer Shade
For spot concealing, test near:
- lower cheek;
- jaw;
- area where you normally conceal.
For under-eye concealer, test directly under the eye when possible.
Do not rely only on:
- wrist;
- back of hand.
Those areas may differ significantly from facial skin.
Natural Light Matters
Artificial shop lighting can change how shades appear.
Whenever possible, check concealer in:
- daylight;
- neutral indoor lighting.
A product may look perfect under warm store lighting but turn:
- orange;
- pink;
- grey;
in daylight.
Concealer Oxidation
Some concealers darken slightly after application.
This may occur as the formula:
- dries;
- interacts with skin oils.
When testing:
- Apply swatch.
- Wait several minutes.
- Recheck shade.
Do not select instantly if the formula is known to shift.
Why Concealer Turns Orange
Possible reasons include:
- undertone too warm;
- shade too dark;
- oxidation;
- foundation interaction.
Try:
- neutral;
- olive;
- cooler shade.
Why Concealer Looks Ashy
Possible causes:
- shade too light;
- undertone mismatch;
- strong darkness underneath.
Try:
- slightly deeper concealer;
- peach/orange corrector first;
- warmer undertone.
Why Concealer Looks Pink
The undertone may simply be too cool.
Try:
- neutral;
- golden;
- olive.
How Much Concealer Should You Use?
Usually much less than social-media tutorials suggest.
For under-eyes, start with:
- one tiny dot near inner corner;
- another where additional darkness exists.
For blemishes:
- one small dot.
You can always add more.
A thick first layer is harder to correct.
Concealer Coverage Should Be Built in Thin Layers
Thin layers:
- blend better;
- crease less;
- look more skin-like.
If more coverage is needed:
- Apply thin layer.
- Blend.
- Let it settle.
- Add only where necessary.
Do not repeatedly coat the entire area.
How to Blend Concealer
Common tools include:
- fingers;
- sponge;
- brush.
Each creates a slightly different result.
Fingers
Fingers work well because body warmth can help melt some formulas into the skin.
Best for:
- under-eyes;
- cream concealers.
Use a gentle tapping motion.
Avoid dragging delicate skin.
Makeup Sponge
A damp sponge gives a soft, diffused result.
Useful for:
- under-eyes;
- larger areas;
- blending edges.
The sponge can absorb some product.
This often creates a more natural finish but may slightly reduce coverage.
Concealer Brush
A brush provides more control.
Useful for:
- blemishes;
- pigmentation;
- precise under-eye placement.
Different brush types include:
- flat synthetic brush;
- small dense brush;
- fluffy blending brush.
Flat Concealer Brush
Provides concentrated coverage.
Best for placing product on:
- blemishes;
- marks.
Follow with a softer tool to blend the edges if necessary.
Fluffy Concealer Brush
Creates a diffused finish.
Useful around:
- under-eyyes;
- nose.
It can prevent product from looking too concentrated.
Sponge vs Brush for Blemishes
For strong spot coverage, a brush is often better because it leaves more product in place.
A sponge may absorb or spread the concealer too much.
You can use:
brush to apply → sponge around the edge
Should Concealer Be Set With Powder?
Not always.
Setting powder can:
- improve wear;
- reduce movement;
- reduce creasing.
But it can also make the area appear:
- drier;
- more textured.
Use only as much as needed.
Setting Under-Eye Concealer
A practical approach:
- Blend concealer.
- Look upward or gently smooth any visible crease.
- Apply a small amount of finely milled powder.
- Focus on areas that actually crease.
You do not necessarily need to heavily bake the under-eye.
What Is Baking?
Baking involves applying a generous layer of loose powder and allowing it to sit before brushing it away.
It can create:
- very matte;
- long-lasting makeup.
But it may emphasize:
- dryness;
- fine lines.
For everyday makeup, a light dusting is usually enough.
Under-Eye Powder for Dry Skin
Use:
- very small amount;
- fine texture.
Or skip powder if your concealer sets well on its own.
Your goal should be longevity without sacrificing comfort.
Concealer for Hot and Humid Weather
Look for:
- long-wear formula;
- good adhesion;
- natural-matte finish.
Use:
- thin layers;
- light powder where needed.
Heavy complexion makeup often becomes less comfortable in heat.
Concealer for Cold or Dry Weather
Choose:
- flexible;
- hydrating;
- natural/radiant formulas.
Prepare skin well.
Reduce heavy powder if the under-eye starts looking dry.
Concealer for Photography
Photography can flatten dimensions and make darkness appear stronger.
For photography, you may choose:
- slightly more coverage;
- careful colour correction.
Avoid concealer that is dramatically lighter than your complexion because flash photography may emphasize the contrast.
Concealer for Bridal Makeup
Bridal concealer generally needs:
- strong longevity;
- photography-friendly finish;
- controlled brightening.
A common approach:
- Correct darkness if necessary.
- Apply thin foundation.
- Add targeted concealer.
- Set strategically.
Coverage should still look like skin at conversational distance.
Concealer for No-Makeup Makeup
Choose:
- light-to-medium coverage;
- natural or radiant finish.
Apply only to:
- inner corners;
- blemishes;
- local redness.
Allow natural skin to remain visible elsewhere.
Concealer for Full-Glam Makeup
You may use:
- higher coverage;
- brighter under-eyes;
- stronger setting.
But even full-glam concealer looks better in controlled layers.
More product is not automatically more polished.
Concealer and Sunscreen
If wearing concealer over sunscreen:
- Apply adequate sunscreen.
- Allow it to settle.
- Tap concealer gently over it.
Avoid vigorous rubbing because you may disturb the sunscreen layer.
Makeup should sit on top of sun protection rather than replace it.
Does Concealer Contain SPF?
Some concealers include SPF.
That can be an additional benefit.
But the amount of concealer normally used is far too small and uneven to serve as your primary sunscreen.
Use a dedicated sunscreen underneath when sun protection is needed.
Concealer and Eye Cream
Eye cream is optional.
If your under-eyes are dry, a small amount of moisturizing skincare can help concealer sit more smoothly.
But too much rich eye cream immediately before makeup may cause concealer to:
- slide;
- crease.
Allow skincare to absorb.
Concealer Primer
You usually do not need a separate concealer primer.
Good:
- skincare;
- thin makeup layers;
are often enough.
If under-eye makeup repeatedly moves, consider adjusting:
- skincare amount;
- concealer formula;
- setting technique.
How Long Should You Wait After Skincare?
There is no exact required time.
Give products enough time to stop feeling:
- very wet;
- slippery.
Then apply makeup.
If concealer is separating immediately, your skincare layers may be too heavy or incompatible with the makeup.
Why Concealer Creases
Creasing happens because:
- skin moves;
- there are natural folds;
- product accumulates in those folds.
Possible contributors include:
- too much concealer;
- overly creamy formula;
- excessive skincare underneath;
- insufficient setting.
Some creasing is normal.
How to Reduce Concealer Creasing
Try:
- Use less skincare under the eye.
- Use less concealer.
- Focus product only on darkness.
- Blend thoroughly.
- Set lightly.
Do not expect the moving eye area to look perfectly airbrushed for twelve hours.
Why Concealer Looks Cakey
Common causes include:
- too much product;
- dry skin;
- too much powder;
- repeated layering;
- formula mismatch.
Try reducing:
- amount;
- powder.
A thinner layer usually improves the finish.
Why Concealer Separates
Possible causes:
- excess skin oil;
- incompatible skincare;
- heavy moisturizer;
- too much product.
Let skincare settle and use thinner layers.
Setting selectively may help.
Why Concealer Settles Into Pores
Very thick or dry formulas can emphasize texture.
Consider:
- lighter coverage;
- flexible finish.
Do not attempt to fill pores with repeated concealer layers.
Why Blemish Concealer Disappears While Blending
You may be blending directly over the centre of the spot.
Instead:
- Place product on blemish.
- Let it sit briefly.
- Blend only the outer edge.
- Keep coverage concentrated in centre.
This maintains opacity.
Spot Concealing Technique
For natural-looking coverage:
- Use small precise brush.
- Match concealer exactly to skin.
- Apply only to the discoloration.
- Feather edge.
- Set with tiny amount of powder if needed.
This technique can sometimes eliminate the need for full-face foundation.
Concealing a Healing Blemish
Healing blemishes may be:
- dry;
- flaky.
Thick concealer can highlight the texture.
Prepare gently with moisturizer.
Use:
- thin concealer;
- tapping motion.
Do not peel flaky skin aggressively.
Concealing Active Acne
Avoid excessive manipulation.
Apply product gently.
If acne is:
- painful;
- inflamed;
prioritize skin comfort over perfect coverage.
Makeup cannot remove the physical texture.
Concealer and Pimple Patches
Some people apply concealer over hydrocolloid acne patches.
This can work cosmetically, but the patch will still have visible:
- edges;
- texture.
Tinted acne patches may be more discreet.
Do not expect concealer to make a raised patch completely disappear.
Concealer for Rosacea
Concealer can reduce visible redness.
A practical approach may include:
- Suitable skincare.
- Optional small amount of green corrector.
- Foundation.
- Targeted concealer.
Avoid repeatedly rubbing sensitive skin.
Persistent rosacea symptoms should be managed medically rather than only covered cosmetically.
Concealer for Vitiligo
Higher-coverage complexion products can help camouflage areas where desired.
Shade matching may require:
- multiple concealers;
- custom mixing.
There is no requirement to conceal vitiligo.
If camouflage is desired, professional complexion products may provide stronger longevity.
Concealer for Birthmarks
Coverage depends on:
- colour;
- depth;
- size.
Colour correction plus high-coverage concealer may work better than one thick layer.
For very strong pigmentation, professional camouflage makeup may be more effective.
Can You Mix Concealer Shades?
Yes.
This is useful when:
- your complexion changes seasonally;
- one shade is slightly too warm;
- you need different depth for under-eye vs blemishes.
Mixing two concealers may create a better match than constantly buying a new shade.
Seasonal Shade Changes
Your complexion may become:
- deeper in summer;
- lighter in winter.
You may need:
- two shades;
- adjustable mixing.
Do not force one concealer to work year-round if it clearly no longer matches.
Concealer Palettes
Palettes can contain multiple:
- skin tones;
- correctors.
They are useful for:
- professional makeup;
- people who need several correction shades.
For everyday personal use, a palette may be unnecessary.
One or two good concealers can be simpler.
Concealer Pots vs Palettes for Professionals
Professionals benefit from:
- multiple undertones;
- mixable textures;
- broad shade range.
For personal makeup, buying ten shades you rarely use is usually poor value.
Concealer Hygiene
Liquid concealers often use applicators that repeatedly return to the tube.
For personal use, normal application is generally practical.
But avoid sharing concealer.
For professional use, products should be:
- decanted;
- handled hygienically.
Concealing an Open or Broken Blemish
Do not apply makeup directly to:
- open;
- bleeding;
- infected-looking skin.
Allow the area to heal.
Applying cosmetics over broken skin may increase irritation or contamination risk.
Washing Concealer Brushes
Wash brushes regularly, particularly if they are used on:
- blemishes;
- oily areas.
Use appropriate cleanser.
Let the brush dry completely.
Dirty tools can affect both:
- makeup finish;
- skin hygiene.
Concealer Expiry
Check the product’s:
- period-after-opening symbol;
- manufacturer guidance.
Replace concealer if you notice major changes in:
- smell;
- texture;
- colour;
- separation.
Liquid complexion products should not be kept indefinitely.
How to Store Concealer
Keep it:
- closed properly;
- away from excessive heat;
- away from direct sunlight.
Do not add water to dried concealer to extend its life.
This can affect:
- preservation;
- stability.
Fragrance in Concealer
Some complexion products contain fragrance.
Many people tolerate them.
But if you have:
- sensitive skin;
- fragrance allergy;
a fragrance-free concealer may be preferable.
Under-eye skin can be particularly sensitive.
Concealer and Alcohol
Some formulas contain volatile alcohols to create:
- quicker setting;
- lightweight texture.
Whether they feel drying depends on:
- concentration;
- complete formulation.
Do not judge the product based on one ingredient alone.
Concealer and Silicones
Silicones are common in complexion products.
They can help create:
- smooth spread;
- slip;
- even texture.
They are not inherently harmful.
Some of the best-performing long-wear concealers rely on silicone-based formulation.
“Non-Comedogenic” Concealer
This term indicates the product was designed or tested with pore-clogging concerns in mind, depending on the brand.
But it is not a guarantee that no individual will break out.
Personal response remains important.
Clean Beauty Concealer
“Clean” has no single universal definition across cosmetics.
Different brands exclude different ingredients.
A clean-labelled concealer is not automatically:
- safer;
- healthier;
- better-performing.
Judge:
- formula;
- regulation;
- tolerance;
- performance.
Natural Concealer
Natural ingredients do not guarantee gentleness.
Botanical extracts can also cause:
- irritation;
- allergy.
Synthetic cosmetic ingredients can be highly safe and useful.
Choose by performance rather than marketing philosophy.
Vegan Concealer
A vegan concealer avoids animal-derived ingredients according to the manufacturer’s standard.
This may matter for ethical preferences.
It does not inherently determine:
- safety;
- coverage;
- quality.
Cruelty-Free Concealer
Cruelty-free status relates to animal-testing policies.
It does not directly indicate product:
- coverage;
- longevity;
- skin compatibility.
Consider it separately from performance.
Does Expensive Concealer Work Better?
Not necessarily.
A premium concealer may offer:
- elegant texture;
- sophisticated shade range;
- luxury packaging;
- strong formulation.
But affordable products can provide excellent:
- coverage;
- blendability;
- longevity.
Price alone cannot predict performance.
What Makes a Concealer Worth Buying?
Look for:
Correct Shade
The most important factor.
Suitable Undertone
Prevents:
- orange;
- pink;
- grey results.
Appropriate Coverage
Enough for your concern.
Good Blendability
Should merge with surrounding complexion.
Flexible Texture
Especially under the eyes.
Good Wear
Should last long enough for your routine.
Suitable Finish
Matte, natural or radiant depending on the area.
How Many Concealers Do You Need?
For many people, one versatile concealer is enough.
A more complete setup may include:
Concealer 1
Skin-matched for:
- blemishes;
- pigmentation.
Concealer 2
Slightly brighter for:
- under-eyes.
Optional:
Corrector
For stronger:
- darkness;
- redness.
You do not need a large concealer collection.
Choosing Your First Concealer
If you are a beginner, look for:
- medium coverage;
- natural finish;
- flexible liquid formula;
- close shade match.
This is easier to use than:
- extremely matte;
- ultra-full coverage products.
Master application before increasing coverage.
Common Concealer Mistakes
Choosing Under-Eye Concealer Too Light
Can look grey or unnatural.
Using Bright Concealer on Blemishes
Highlights them instead of hiding them.
Applying Too Much
Creates heaviness and creasing.
Covering the Entire Under-Eye Automatically
Target only the dark areas first.
Using Very Dry Formula on Dry Under-Eyes
Can emphasize texture.
Using Radiant Concealer on Raised Acne
May reflect light from the texture.
Skipping Colour Correction When Darkness Is Strong
More beige concealer may simply create thickness.
Applying Too Much Corrector
Correction should disappear beneath a thin concealer layer.
Over-Powdering
Can make makeup look dry.
Ignoring Undertone
Correct depth with wrong undertone still looks mismatched.
A Simple Under-Eye Concealer Routine
- Apply skincare.
- Allow it to settle.
- Add tiny amount of peach corrector if needed.
- Place concealer near strongest darkness.
- Tap gently.
- Add second thin layer only if required.
- Set lightly if needed.
A Simple Blemish-Concealing Routine
- Apply foundation if using it.
- Choose exact skin-tone concealer.
- Dot directly on blemish.
- Allow product to settle briefly.
- Blend only edges.
- Set carefully with powder.
A Simple Routine for Dark Spots
- Apply sunscreen and allow it to settle.
- Use foundation if desired.
- Add warm corrector only if needed.
- Apply skin-matched concealer.
- Tap rather than rub.
- Set lightly.
A Simple Concealer-Only Routine
For minimal makeup:
- Moisturizer
- Sunscreen
- Concealer under eyes
- Concealer around nose
- Spot conceal blemishes
- Blend edges
- Powder only where needed
This keeps most of the natural skin visible.
A Simple Routine for Mature or Dry Under-Eyes
- Use light moisturizing skincare.
- Allow it to absorb.
- Apply a flexible medium-coverage concealer.
- Use a very small amount.
- Blend with finger or damp sponge.
- Powder only where creasing occurs.
A Simple Full-Coverage Routine
- Colour correct where necessary.
- Apply thin foundation.
- Spot conceal remaining discoloration.
- Brighten under-eye with controlled amount.
- Set strategically.
Full coverage should come from targeted layering, not one very thick layer.
Concealer Buying Checklist
Before buying, ask:
1. What am I concealing?
Under-eyes, blemishes, redness or pigmentation?
2. Do I need an exact skin match or brightening shade?
Blemishes generally need exact matching.
3. What is my undertone?
Warm, cool, neutral or olive?
4. How much coverage do I actually need?
Sheer, medium or full?
5. What finish suits the area?
Matte, natural or radiant?
6. Is my under-eye dry?
Choose flexibility over extreme matte coverage.
7. Do I have strong discoloration?
Consider colour correction rather than adding layers.
8. Does the concealer oxidize?
Test and wait.
9. Will I wear it with foundation or alone?
Shade matching becomes even more important when worn alone.
10. Can I achieve the result with a thin layer?
If yes, the formula is probably a good fit.
When Should You Stop Using a Concealer?
Stop if you develop:
- persistent burning;
- itching;
- swelling;
- rash;
- worsening irritation.
Do not apply makeup directly over:
- open;
- actively bleeding;
- infected-looking skin.
If you repeatedly develop irritation around the eyes, consider professional dermatological evaluation.
The Physical Glow Takeaway
The right concealer depends first on what you are trying to conceal.
For under-eyes:
- choose a flexible formula;
- match or slightly brighten your skin;
- use peach or orange corrector only when stronger darkness needs neutralizing.
For blemishes:
- choose a concealer that matches your skin closely;
- use stronger coverage;
- blend the edges rather than wiping coverage away from the centre.
For pigmentation:
- accurate undertone matters;
- targeted colour correction may reduce the amount of concealer required.
Then choose the finish according to the area:
- dry or mature under-eyes → natural or radiant flexible formula;
- oily skin or blemishes → natural-matte or long-wear formula;
- everyday use → medium-coverage natural finish is usually the most versatile.
Most importantly:
use less product than you think you need.
A small amount placed exactly where darkness, redness or pigmentation is strongest usually looks better than a thick layer spread across the entire face.
The best concealer should make the complexion look more even while still allowing the skin to look like skin.