Indoor Bike Saddle Setup: Height, Reach and Knee Comfort
Adjust your stationary bike gradually for comfortable pedaling, manageable reach and less unnecessary knee or wrist strain.
An indoor exercise bike can provide an effective cardiovascular workout without requiring outdoor roads, a large workout area or complicated equipment.
However, even a good-quality exercise bike can feel uncomfortable when its saddle and handlebars are incorrectly adjusted.
You may notice pressure at the front of your knees, discomfort behind the knees, aching shoulders, numb hands or excessive weight on the saddle. Some people assume these problems are an unavoidable part of cycling.
In reality, the riding position may be contributing to the discomfort.
The saddle height, distance from the handlebars, handlebar position and relationship between the saddle and pedals can all influence how your body moves during cycling.
A comfortable indoor cycling setup should allow smooth pedalling, stable hips, manageable pressure on the hands and a knee position that does not repeatedly cause discomfort.
There is no single saddle height or handlebar setting that works for everyone. Body proportions, flexibility, previous injuries, bike design and exercise intensity all influence the appropriate setup.
This Physical Glow guide explains how to adjust an indoor bike’s saddle height, evaluate handlebar reach, recognize common knee-comfort problems and make practical adjustments before your next workout.
1. Why Indoor Bike Setup Matters
Indoor cycling is often considered a relatively low-impact exercise because body weight is supported partly by the saddle while the legs move through a repeated pedalling motion.
However, low impact does not mean the activity places no demands on the joints or surrounding tissues.
During cycling, the knees repeatedly flex and extend while the hips, ankles and trunk help control the movement.
A poorly adjusted bike may cause some riders to move awkwardly or experience discomfort.
Common Problems Associated With an Unsuitable Setup
- Excessive knee bending at the bottom of the pedal stroke.
- Overreaching to reach the pedals.
- Hips rocking from side to side.
- Uncomfortable pressure on the hands.
- Excessive leaning toward the handlebars.
- Sliding forward on the saddle.
- Foot numbness.
- Persistent pressure around the saddle.
Some symptoms may be related to training load, medical conditions or other factors rather than bike fit alone.
The purpose of a setup assessment is to identify obvious fit problems before increasing workout intensity.
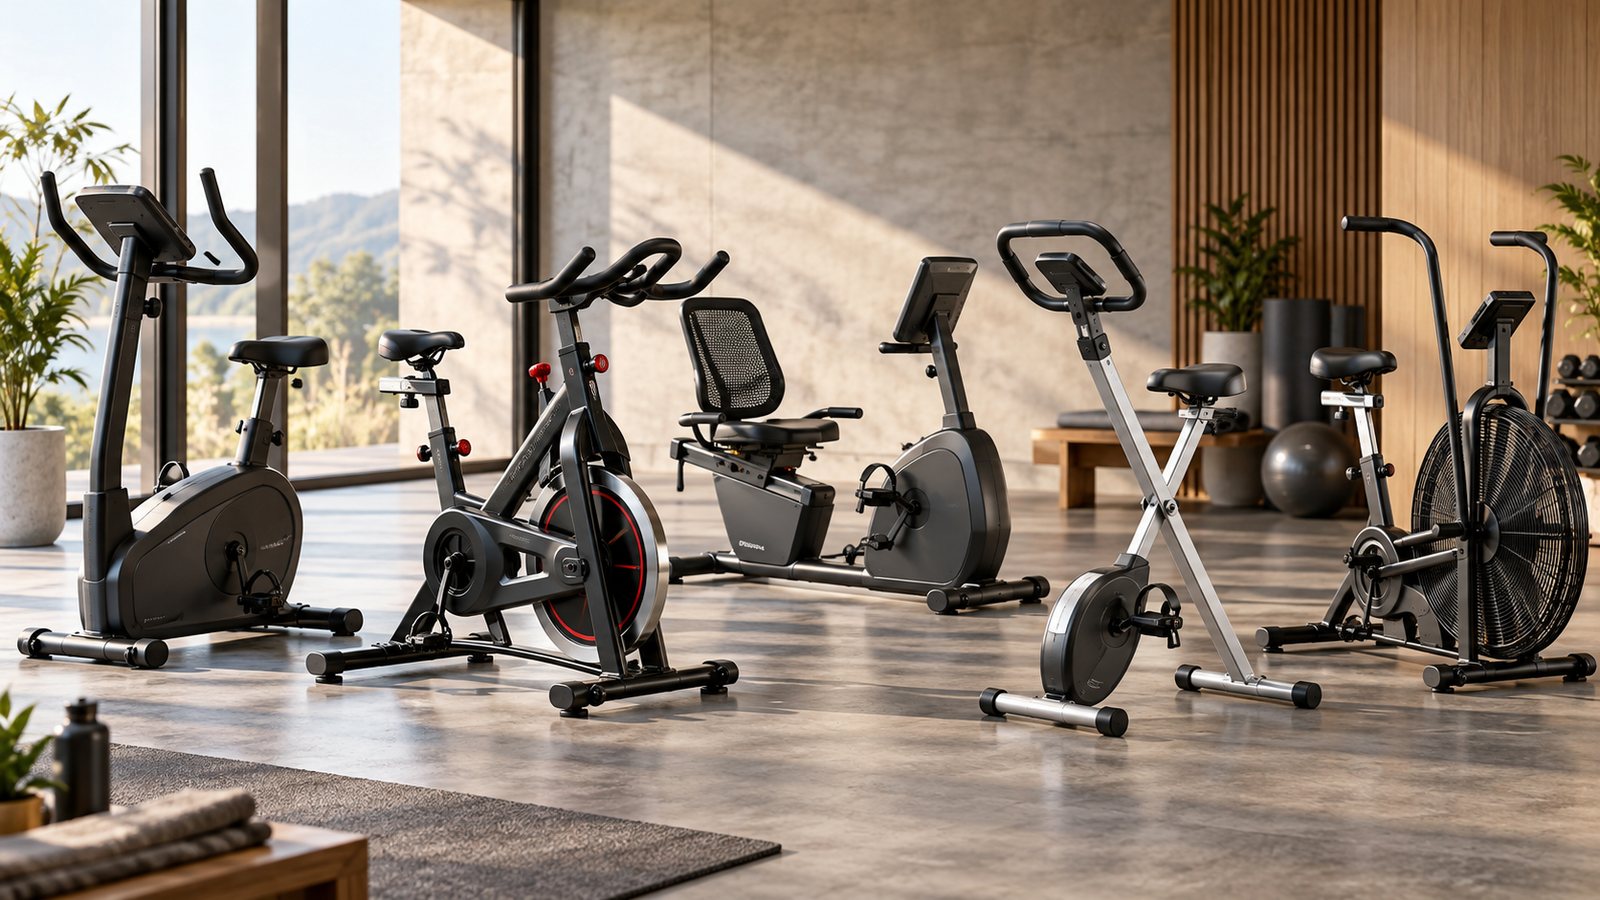
2. Know Which Type of Indoor Bike You Have
Different exercise-bike designs require different adjustments.

Upright exercise bike
Typically offers a relatively upright riding position with a saddle and handlebars. Commonly used for general home cardio.

Indoor cycling or spin-style bike
Often provides more adjustment options and a more forward-leaning riding position. May support seated and standing efforts.

Recumbent exercise bike
Uses a supported seat and forward-positioned pedals. Seat distance and back support are more relevant than conventional saddle height.
The adjustments described below focus mainly on upright and spin-style stationary bikes.
For recumbent bikes, use the manufacturer’s instructions to adjust the seat-to-pedal distance and back support.
Do not apply conventional upright-bike saddle measurements directly to a recumbent model.
3. Start With Saddle Height
Saddle height is one of the most influential settings on an upright indoor bike.
If it is too low, the knee may remain excessively bent during the pedal stroke.
If it is too high, the rider may have to reach downward with the foot or shift the pelvis from side to side.
Either situation can contribute to an uncomfortable riding position.
A Practical Starting Method
One commonly used initial fitting method is the heel-on-pedal check.
The heel-on-pedal starting check
- Secure the bike and use a stable support when mounting.
- Place one pedal at the bottom of its rotation.
- Rest the heel of that foot on the pedal, following the bike’s safe-use instructions.
- Adjust the saddle until the leg is approximately straight without having to rock the hips or reach excessively.
- Return the foot to the normal pedalling position and check that the knee retains a comfortable bend while pedalling.
This method is an approximate starting point, not a precise professional bike fit. Keep the bike stable and stop if the position causes pain.
What Should You Feel?
During ordinary pedalling, you should generally be able to maintain a stable pelvis and smooth leg movement without repeatedly stretching for the bottom pedal position.
Avoid locking or forcing the knee into full extension during normal cycling.
4. Signs Your Saddle Is Too Low
A saddle set too low can cause excessive knee flexion during parts of the pedal stroke.
Possible signs include:
- A cramped feeling at the top of the stroke.
- Knees rising very high toward the torso.
- Discomfort around the front of the knee.
- Difficulty producing a smooth pedal stroke.
- A sensation that the legs cannot extend comfortably.
However, pain at the front of the knee is not proof that saddle height is the only problem.
Resistance level, training intensity, previous injuries and other factors can also contribute.
What Can You Try?
If the saddle is visibly low and the riding position feels cramped, a small upward adjustment may improve comfort.
Make one adjustment at a time.
Avoid raising the saddle substantially based only on a diagram.
If symptoms persist, a qualified bike fitter or healthcare professional may be able to identify additional causes.
5. Signs Your Saddle Is Too High
A saddle that is too high can also create problems.
The rider may struggle to maintain consistent contact with the pedals or compensate by moving the hips.
Common Warning Signs
- Pelvis rocks from side to side.
- Toes point excessively downward to reach the pedal.
- The rider feels stretched at the bottom of the stroke.
- Pressure develops behind the knee.
- The rider repeatedly shifts position on the saddle.
Why Hip Rocking Matters
If the hips must shift to reach each pedal, the movement may become less efficient or comfortable.
A small saddle-height reduction may help when excessive height is the cause.
However, the rider’s technique and bike dimensions also matter.
Should You Aim for a Perfectly Straight Leg?
No.
The straight-leg heel test is only an initial fitting technique.
During normal pedalling, the knee should generally retain a comfortable degree of flexion.
Do not force the leg to lock straight with each rotation.
6. What Is the Correct Knee Angle for Indoor Cycling?
You may encounter guides that specify a knee-flexion range of approximately 25–35 degrees at the bottom of the pedal stroke.
Such figures can appear in bike-fitting methods, but they depend on how the angle is measured, the rider’s position and the fitting protocol.
They should not be interpreted as a universal medical requirement.
Why Exact Measurement Is Difficult at Home
A phone camera or casual visual estimate can be affected by:
- Camera position.
- Pedal position.
- Ankle posture.
- Clothing.
- Individual anatomy.
- Whether the rider is moving or stationary.
What Matters More for a Beginner?
A beginner should prioritize a stable, comfortable riding position and smooth pedalling.
If knee discomfort persists despite reasonable adjustments, a professional assessment may be more useful than trying to match an exact number from a generic image.
7. Saddle Fore-Aft Position: Moving the Seat Forward or Backward
Some indoor bikes allow the saddle to slide horizontally.
This is called fore-aft adjustment.
It affects the rider’s relationship to the pedals and handlebars.
Moving the Saddle Forward
This changes the position of the pelvis relative to the crank and may reduce the distance to the handlebars.
However, it can also alter lower-limb mechanics and pressure distribution.
Moving the Saddle Backward
This increases the horizontal distance from the saddle to the handlebars and changes the relationship between the hip and pedals.
Is There a Universal Correct Position?
No.
Body proportions, bike geometry, flexibility, comfort and riding goals all matter.
A traditional fitting approach may examine knee position relative to the pedal spindle, but it is not a universal rule that guarantees optimal joint loading.
The Practical Approach
Begin with the manufacturer’s recommended neutral position.
Adjust gradually if the bike supports this feature.
Assess whether you can pedal smoothly without feeling pushed too far forward or stretched too far backward.
8. Handlebar Reach: How Far Should You Lean?
Handlebar reach describes the distance and position between the saddle and the handlebars.
A poor reach can create discomfort even when saddle height is appropriate.
If the Handlebars Are Too Far Away
You may notice:
- Excessive forward leaning.
- Strained shoulders.
- Overextended arms.
- Pressure on the palms.
- Discomfort in the neck or lower back.
If the Handlebars Are Too Close
You may feel cramped.
The elbows may have limited room, and the upper body may struggle to maintain a relaxed position.
A Comfortable Starting Position
For general indoor cardio, aim for a position that allows:
- Relaxed shoulders.
- Comfortable elbow flexion.
- A manageable trunk angle.
- Stable hips.
- Hands resting without excessive pressure.
A highly aggressive racing position is not necessary for ordinary home fitness.
9. Handlebar Height: Higher or Lower?
Handlebar height changes how much the rider leans forward.
A higher handlebar position may feel more comfortable for beginners and people who prefer a more upright posture.
A lower position may be used for certain cycling goals, but it can increase demands on flexibility and trunk control.
Higher Handlebars May Help When
- The rider feels excessively stretched.
- Neck or shoulder tension develops.
- A more upright position is preferred.
- The rider is beginning indoor cycling.
Lower Handlebars May Be Appropriate When
- The bike supports the adjustment.
- The rider is comfortable with the posture.
- The setup suits the intended cycling activity.
Avoid Forcing the Position
There is no reason to copy a professional cyclist’s low handlebar setup if your goal is moderate home cardio.
Comfortable, repeatable exercise is more important than appearance.
10. Why Your Hands Become Numb on an Indoor Bike
Hand numbness can result from prolonged pressure or irritation involving nerves or other tissues.
It may be influenced by how much body weight is transferred through the hands.
Possible Setup Contributors
- Excessive forward reach.
- Low handlebars.
- Locked elbows.
- Strong gripping.
- Poor wrist position.
- Prolonged pressure through the palms.
What Can Help?
Try relaxing your grip.
Keep the elbows slightly flexed rather than rigidly locked.
Review whether the handlebars are too far away or too low.
Change hand position when the bike design allows it safely.
When to Seek Medical Advice
Persistent numbness, weakness or symptoms continuing after exercise should be assessed rather than attributed automatically to poor bike fit.
11. Knee Pain During Indoor Cycling: Where Is the Discomfort?
Knee discomfort can occur for different reasons.
The location may provide useful clues, but it cannot independently establish a diagnosis.
| Pain location | Possible contributing factors | What to review |
|---|---|---|
| Front of knee | Excessive knee flexion, training load or other conditions | Saddle height, resistance and workload |
| Back of knee | Overextension or other soft-tissue conditions | Excessive saddle height |
| Inner knee | Foot positioning, load or other factors | Pedal alignment and technique |
| Outer knee | Repetitive loading or other conditions | Bike setup and training history |
| General knee discomfort | Multiple possible causes | Full setup, intensity and medical history |
Important Caution
Do not continue exercising through significant knee pain to see whether it disappears.
Stop or reduce activity as appropriate.
Seek professional advice if discomfort persists, worsens, follows injury or is accompanied by swelling, locking or instability.
12. Pedalling Resistance and Knee Comfort
Bike setup is not the only factor affecting the knees.
Resistance level and pedalling cadence also influence the demands of the workout.
Very High Resistance
Heavy resistance may increase the force required during each pedal stroke.
For some riders, particularly beginners, this can feel uncomfortable.
Very Low Resistance
Extremely low resistance may feel uncontrolled on certain bike designs, particularly when the rider is unfamiliar with the equipment.
A Practical Starting Point
Choose a resistance level that permits controlled, smooth pedalling.
Avoid immediately starting with intense standing climbs or high-resistance intervals.
Increase difficulty progressively according to fitness and tolerance.
Is Faster Pedalling Always Better?
No.
Pedalling rapidly without control can compromise technique.
A comfortable rhythm with stable posture is a better beginner priority than achieving an arbitrary cadence.
13. Foot Position on the Pedal
Foot placement affects how forces are transferred through the lower limb.
A common starting approach is to position the ball of the foot approximately over the pedal axle, consistent with the bike’s pedal design and instructions.
However, precise positioning varies with footwear, cycling discipline and individual anatomy.
What Should You Check?
- The foot feels secure.
- The shoe does not slide unexpectedly.
- The ankle moves comfortably.
- Pedal straps are not painfully tight.
- The toes are not compressed.
- The knee does not repeatedly move in an uncomfortable pattern.
What About Cycling Shoes?
Some indoor cycling bikes are compatible with clip-in pedals and cycling shoes.
Cleat position and pedal release mechanisms require attention.
Follow the pedal manufacturer’s instructions.
If using clip-in pedals for the first time, practise safe engagement and release before beginning a demanding workout.
14. Saddle Tilt and Saddle Pressure
Saddle height and position are important, but the angle of the saddle can also affect comfort.
A substantially nose-up saddle may increase pressure in certain sensitive areas.
A substantially nose-down saddle may cause the rider to slide forward and support excessive weight through the hands.
Start Near the Manufacturer’s Neutral Position
For many conventional saddles, approximately level is a reasonable initial reference, although the intended setup varies by saddle design.
Do Not Compensate for One Problem by Creating Another
Tilting the saddle sharply downward to reduce pressure may create hand numbness or shoulder discomfort.
Likewise, raising the nose excessively may increase localized pressure.
Persistent Numbness Is a Warning
Genital or perineal numbness should not be considered a normal requirement of indoor cycling.
Stop and reassess the setup.
If symptoms persist, seek appropriate medical advice.
15. How to Make the Saddle More Comfortable
Discomfort during the first few rides may partly reflect unfamiliarity with the activity.
However, repeated pain or numbness should not be dismissed as something you must simply tolerate.
Check Saddle Width and Shape
A saddle that is poorly suited to your anatomy may create excessive pressure.
Wider is not always better.
The most suitable design depends on your position, pelvic anatomy and riding style.
Review Your Position
Excessive forward leaning, incorrect height or sliding may contribute to discomfort.
Consider Cycling Shorts
Padded cycling shorts can improve comfort for some riders.
However, padding does not correct a fundamentally unsuitable bike setup.
Avoid Excessively Thick Saddle Covers
Very soft covers may feel comfortable initially but can change pressure distribution or increase movement.
They do not guarantee long-term comfort.
Build Duration Gradually
For beginners, shorter sessions may make it easier to establish tolerance.
Increase duration as appropriate without pushing through pain.
16. A Simple Indoor Bike Setup Sequence
Adjusting multiple settings at once can make it difficult to determine which change improved or worsened the fit.
Use a consistent sequence.
Before your first proper ride
- Set saddle heightUse the manufacturer’s procedure and a comfortable initial leg-extension check.
- Check horizontal saddle positionBegin with a neutral setting and verify that the pedalling position feels balanced.
- Adjust handlebar height and reachKeep shoulders relaxed and avoid excessive hand pressure.
- Secure your feetEnsure appropriate pedal contact or correctly fitted straps and cleats.
- Pedal gentlyAssess hip stability, knee comfort and upper-body posture at low resistance.
- Change one setting at a timeMake small adjustments and reassess.
Do not adjust moving components while pedalling. Follow the bike’s adjustment and locking instructions, including minimum insertion markings on seatposts and handlebar posts.
17. How to Check Whether Your Hips Are Rocking
Excessive side-to-side pelvic movement may indicate that the rider is reaching too far at the bottom of the pedal stroke.
However, it may also relate to technique or other individual factors.
What to Observe
During gentle pedalling, check whether:
- One hip repeatedly rises or drops.
- You slide across the saddle.
- You must point the toes excessively to reach the pedal.
- The trunk sways noticeably.
- You feel unstable.
Can a Mirror Help?
A securely positioned mirror may help, provided it does not interfere with cycling.
A short side-view recording may also provide useful visual information.
However, camera observations are not a substitute for a professional assessment.
What Adjustment Might Help?
If the saddle is clearly too high, a modest reduction may improve stability.
Do not repeatedly lower the saddle if it creates excessive knee bending or discomfort.
18. Indoor Bike Setup for Beginners vs Experienced Riders
Beginners and experienced cyclists may prefer different positions.
Beginners
Priorities generally include:
- Easy mounting and dismounting.
- Comfortable reach.
- Stable hips.
- Smooth pedalling.
- Manageable resistance.
- Shorter initial sessions.
Experienced Riders
More experienced users may make individualized adjustments based on workout intensity, bike geometry and performance preferences.
However, experience does not eliminate the need for comfort or safety.
Should Everyone Copy a Spin Instructor?
No.
A cycling instructor’s saddle and handlebar positions reflect their body and equipment.
Copying them directly may produce an unsuitable fit.
Use your own measurements, comfort and the bike’s adjustment range.
19. When a Bike Is Simply the Wrong Size
Not every fitting problem can be corrected.
Some indoor bikes have limited adjustment ranges.
For example, a tall rider may be unable to achieve adequate leg extension.
A shorter rider may struggle to reach the pedals or handlebars even at minimum settings.
Signs of Poor Bike Compatibility
- Saddle cannot be adjusted to a usable height.
- Handlebars remain too far away.
- Rider cannot mount or dismount safely.
- Knees remain excessively bent even at maximum saddle height.
- Feet do not contact pedals securely.
- Safe riding requires exceeding marked adjustment limits.
Do Not Modify Equipment Beyond Its Design
Avoid improvised seatpost extensions, unstable spacers or unapproved handlebar modifications.
These can compromise stability.
If the bike cannot accommodate your body safely, a different model may be necessary.
20. Indoor Bike Fit Self-Check
Use this interactive checklist after adjusting your exercise bike and completing a short, easy pedalling trial.
Bike setup checklist
0/10My saddle and handlebars are securely locked.My feet reach the pedals without overstretching.My knees remain comfortably flexed while pedalling.My hips do not rock excessively from side to side.My shoulders feel relaxed.My elbows are not rigidly locked.My hands are not supporting excessive body weight.My feet remain secure on the pedals.I do not experience knee pain, numbness or unusual pressure.I can mount and dismount safely.
Review the unchecked items before increasing workout intensity. Pain, numbness or instability should not be ignored.
Reset checklistThis checklist is an educational aid, not a professional bike fit or medical examination.
21. Choosing an Exercise Bike With Better Fit Adjustability
If you are purchasing a home exercise bike, fit adjustability deserves as much attention as display features or resistance levels.
| Buying feature | Why it matters |
|---|---|
| Saddle height range | Determines whether the bike accommodates your leg length |
| Fore-aft saddle adjustment | Helps customize horizontal position |
| Handlebar height | Influences upper-body posture |
| Handlebar reach | Affects shoulder, back and hand comfort |
| Pedal design | Influences foot security |
| User-height guidance | Helps screen for possible fit compatibility |
| Rated user weight | Important for safe equipment use |
| Frame stability | Reduces unwanted movement |
| Mounting clearance | Helps with safe entry and exit |
| Adjustment locks | Must secure the chosen settings reliably |
Does a Higher Price Guarantee Better Fit?
No.
A more expensive bike may provide additional resistance technology, a larger display or connected workout features.
But those features do not guarantee that its geometry suits every rider.
A simpler bike with suitable adjustments may be more comfortable than a premium model with an unsuitable riding position.
Before Buying Online
Check the manufacturer’s dimensions and user-height guidance.
Look for saddle and handlebar adjustment details.
Review assembly requirements and return conditions.
For product comparisons, see Physical Glow’s Fitness equipment and training guides section, including relevant exercise-bike buying guides.
The key buying question is whether the specific model can accommodate your body comfortably—not simply whether it offers enough resistance levels.
22. Common Indoor Bike Setup Mistakes
Mistake 1: Setting Saddle Height Based Only on Appearance
A saddle that looks correct may still be too high or low for your body.
Mistake 2: Riding With the Knees Excessively Bent
A cramped pedal stroke may contribute to discomfort.
Mistake 3: Raising the Saddle Until the Leg Locks Straight
This may create excessive reach and pelvic rocking.
Mistake 4: Ignoring Handlebar Reach
A well-adjusted saddle cannot compensate for every upper-body positioning problem.
Mistake 5: Gripping the Handlebars Too Tightly
Excessive gripping may contribute to hand and shoulder discomfort.
Mistake 6: Choosing High Resistance Immediately
Beginners may benefit from establishing comfortable movement before increasing workload.
Mistake 7: Moving the Saddle to Fix Every Problem
Some discomfort originates from handlebar reach, pedal position or training intensity.
Mistake 8: Ignoring Foot Position
Unstable or uncomfortable foot placement can affect the cycling experience.
Mistake 9: Assuming Numbness Is Normal
Persistent hand, foot or saddle-area numbness should be addressed.
Mistake 10: Using Improvised Equipment Modifications
Unapproved modifications can create mechanical hazards.
23. Frequently Asked Questions
How high should the saddle be on an indoor bike?
The saddle should allow comfortable pedalling without excessive knee bending, overextension or significant hip rocking. A heel-on-pedal check can provide an approximate starting position.
Should my knee be completely straight at the bottom of the pedal stroke?
No. During normal pedalling, the knee generally retains some flexion. The heel-on-pedal straight-leg check is only an initial fitting technique.
Why does the front of my knee hurt when cycling?
Several factors may contribute, including bike setup, resistance level, training load or an underlying condition. Persistent pain should be professionally assessed.
Does a saddle that is too low cause knee pain?
It can contribute to discomfort in some riders, but knee pain has multiple possible causes.
Why does the back of my knee hurt after cycling?
Excessive extension can be one possible contributor, but pain behind the knee requires broader assessment if it persists.
How far should I sit from the handlebars?
You should be able to reach them comfortably without excessive stretching or supporting unnecessary weight through the hands.
Should indoor bike handlebars be higher than the saddle?
For many beginners and general fitness users, a relatively upright setup can be comfortable. The correct position depends on the bike and rider.
Why do my hips rock when pedalling?
A saddle that is too high may contribute, although technique and other factors can also affect pelvic movement.
Can an incorrect bike setup cause numb hands?
Excessive pressure, poor wrist position and unsuitable reach may contribute. Persistent numbness needs medical assessment.
Is saddle soreness normal for beginners?
Some initial unfamiliarity may occur, but significant pain, persistent numbness or skin injury should not be ignored.
Should I use a padded saddle cover?
It may improve comfort for some users, but it cannot fix a fundamentally poor setup and may alter pressure distribution.
Can I adjust the bike while pedalling?
Do not adjust moving components while riding. Stop and follow the equipment’s instructions.
Should my feet point downward while pedalling?
Foot and ankle movement naturally varies, but excessive toe pointing to reach the pedals may suggest an overly high saddle.
Are recumbent bikes easier on the knees?
They offer a different supported position that some users may find comfortable, but suitability depends on the individual and their condition.
Can indoor cycling help with general fitness?
Yes. Indoor cycling can contribute to aerobic physical activity as part of an appropriately planned routine.
How long should a beginner cycle?
Start with a duration and intensity appropriate for current fitness and health, then increase gradually. There is no single starting duration suitable for everyone.
Is heavier resistance better for strengthening the knees?
Not necessarily. Excessive resistance may increase discomfort. Exercise selection and progression should reflect individual capacity and any medical guidance.
Should I use cycling shoes for an exercise bike?
They are not mandatory for every bike. Use footwear compatible with its pedals and follow the equipment’s instructions.
Can I use a spin bike if I have knee arthritis?
Some people with knee arthritis use stationary cycling as part of an exercise program, but appropriate setup, resistance and medical guidance depend on symptoms and individual health.
When should I seek professional bike fitting?
Consider professional assessment if discomfort persists despite reasonable adjustments, if your proportions are difficult to accommodate or if you plan prolonged or intensive cycling.
24. Final Verdict: Comfort Comes Before Intensity
An indoor exercise bike is most useful when you can ride it comfortably and consistently.
Begin by adjusting the saddle so that your legs can move through a smooth pedal stroke without excessive reaching or knee compression.
Check that your hips remain reasonably stable.
Then evaluate handlebar height and reach.
Your shoulders should feel relaxed, your hands should not carry excessive weight and your position should not force you into an uncomfortable forward lean.
Pay attention to your feet and pedals as well.
A secure, comfortable foot position contributes to controlled movement.
If you experience knee pain, persistent numbness or saddle-area discomfort, review the setup and training intensity rather than assuming the symptoms are unavoidable.
Make changes gradually and evaluate one adjustment at a time.
The ideal indoor bike position is not the one that looks most athletic. It is the one that allows controlled pedalling with a stable posture and sustainable comfort.
Editorial References and Further Reading
- American College of Sports Medicine — Exercise prescription, cardiovascular fitness and training principles.
- American Academy of Orthopaedic Surgeons — OrthoInfo — Knee health, overuse conditions and exercise-related injury resources.
- Centers for Disease Control and Prevention — Physical Activity Basics — General adult physical-activity guidance.
- NHS — Exercise Guidance — Practical information on exercise and physical activity.
- Indoor bike manufacturer manuals — Model-specific saddle adjustments, handlebar limits, pedal compatibility and safe-use requirements.
Physical Glow Editorial Note: This article provides general indoor cycling and fitness-equipment guidance. It does not replace a professional bike fit, physiotherapy assessment or medical advice. Stop exercising and seek appropriate medical attention for persistent pain, significant swelling, numbness, weakness or other concerning symptoms.